Record-Triggered Emails
In this workshop, you will configure a flow that sends a personalised transactional email when a CRM Contact record is created.
Create Apex Class
To personalize your email with variables from a Flow interview, you will need to define a simple Apex Wrapper class. This class acts as a Data Transfer Object (DTO), structuring your Flow data into a format that the Apex Class Data Provider can easily consume to dynamically populate email content.
- Click on the icon and click the first Setup menu item.
- In the Quick Find field, enter
Apex Classesand select Apex Classes from the Custom Code menu. - Click New.
- Copy and paste the code in the Apex Class text area.
- Click Save.
public class contactValues {

    @AuraEnabled public String firstName;

}
Adding Apex Variables
This simple class will pass a Contact's first name from a Flow interview into a personalized email. If you need more personalization strings, you can easily extend this class by duplicating the line in this class for other field values.
Create Apex Test Class (Optional)
Apex test classes are separate scripts that simulate user actions and system events. They create mock data in a temporary, isolated environment to see if your logic evaluates correctly. You can't deploy code to a Production environment unless your test classes cover at least 75% of your executable lines.
While not required in an SDO, you will need to choose a deployment method in production environments which includes validating all test classes in your org.
A sample test class is provided below. Follow the steps in the previous exercise to add this test class to your org.
@isTest
private class ContactValuesTest {

    @isTest
    static void testContactValuesProperties() {
        contactValues cv = new contactValues();
        cv.firstName = 'John';
        System.assertEquals('John', cv.firstName, 'FirstName should be set');
    }

    @isTest
    static void testContactValuesWithEmptyValues() {
        contactValues cv = new contactValues();
        cv.firstName = '';
        System.assertEquals('', cv.firstName, 'FirstName can be empty');
    }
}
Create Welcome Email
- Search for
Marketingfrom App Launcher. - Select the Marketing App (with a gray icon).
- Select the Content tab.
- Select Content Workspace for Marketing Cloud from the list view.
- Click Add
and select Content. - Click on the Email radio button, then click Create.
- Select the Use Components tile and click Select.
- Click the pencil icon
Under the Subject Line heading and enter the subject line Welcome to Northern Trail Outfittersin the highlighted Subject Line field. - Change the Message Purpose field to Transactional.
- Drag the Paragraph component to the email content area.
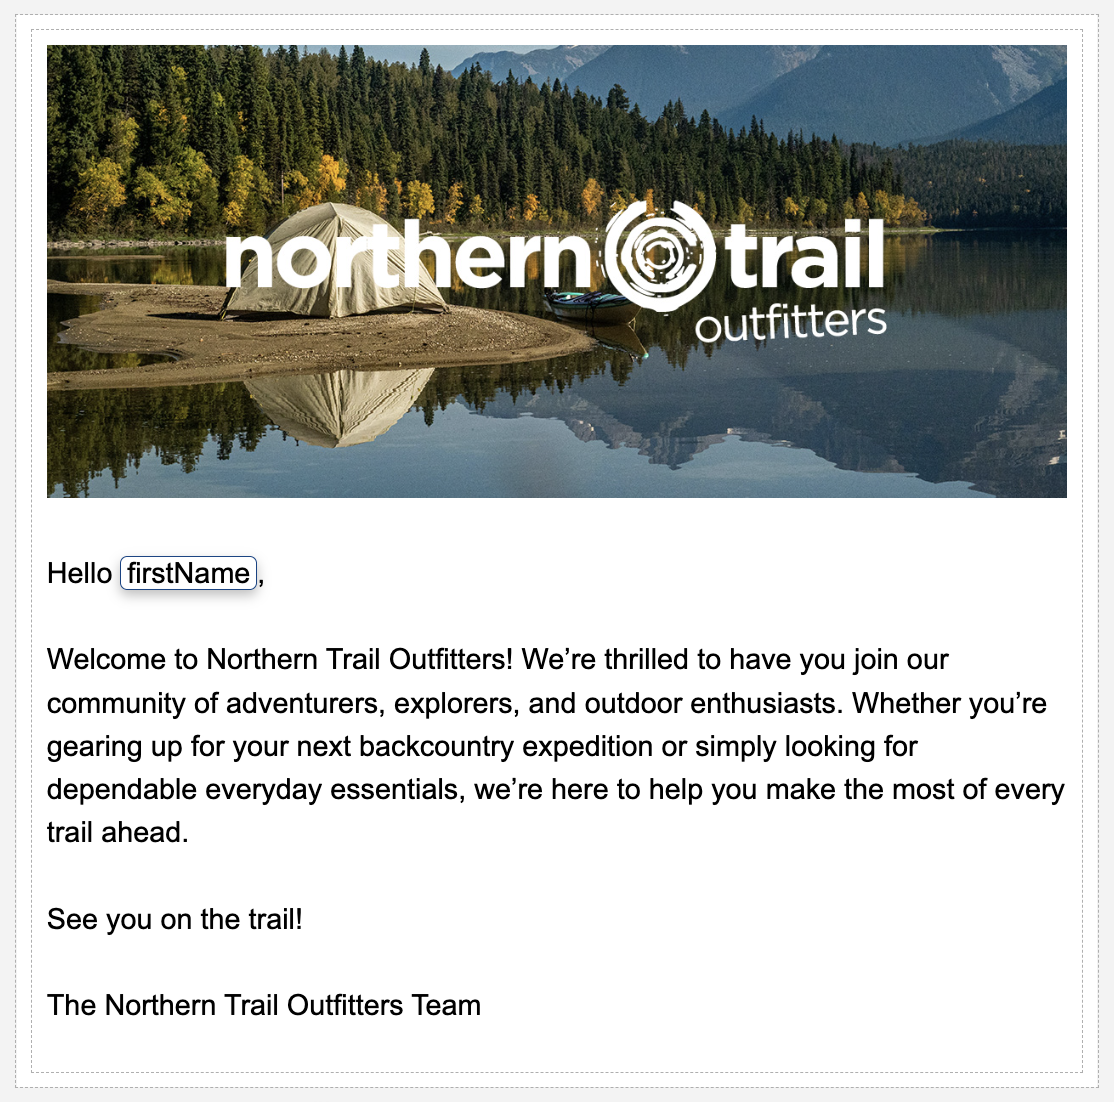
- Paste the below text in the paragraph content block.
Hello,

Welcome to Northern Trail Outfitters! We’re thrilled to have you join our community of adventurers, explorers, and outdoor enthusiasts. Whether you’re gearing up for your next backcountry expedition or simply looking for dependable everyday essentials, we’re here to help you make the most of every trail ahead.

See you on the trail!

The Northern Trail Outfitters Team- Click the Data Sources tab in the Email panel.
- Click Add.
- Select Apex Class Data Provider from the Type menu.
- Enter
contactValuesin the Name field. - Search and select
contactValuesin the Apex Class field.
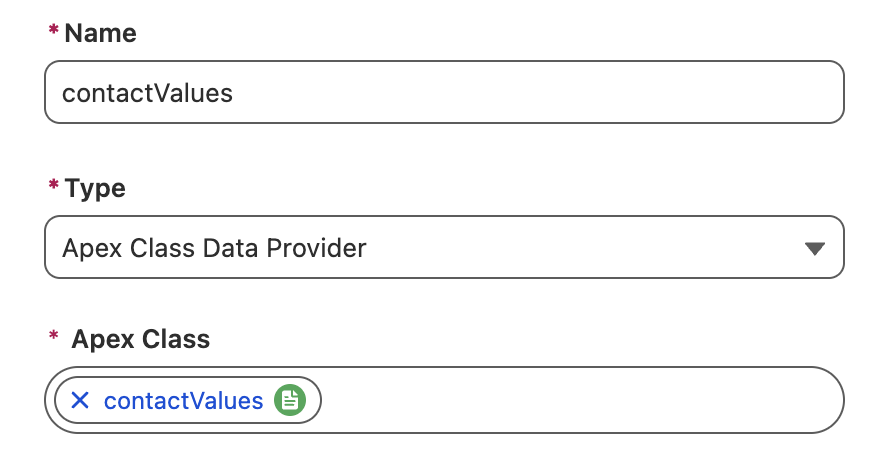
- Click Save.
- Insert your cursor in the paragraph component after the word 'Hello' and add a space character.
- Click on the merge field icon
then scroll down and select Apex Class Data Provider. - In the Resource field, select Primary Objects, then firstName.
- Click Done in the Configure Merge Fields dialog.
- Optionally, edit the email content—for example, add a banner image.
- Click the gear icon
in the top toolbar and enter Welcome Emailin the Title field. - Click Done.
- Click Save.
- Click Publish.
- Click Next and Publish Now in the Publish Content dialog.
- Click the back arrow
in the top left corner of the page to return to the Content page.
Create an Automation Event-Triggered Flow
In this exercise, you’ll configure a flow that runs when a new CRM Contact record is created.
Triggering Flows for Related Records
Flows can also be triggered when other CRM objects are created or updated, provided they have a relationship to a Prospect, Lead, or Contact record.
- Click on the Flows tab.
- Click New.
- Click the Triggered Automations tile.
- Click the Automation Event-Triggered Flow tile.
- Click Next.
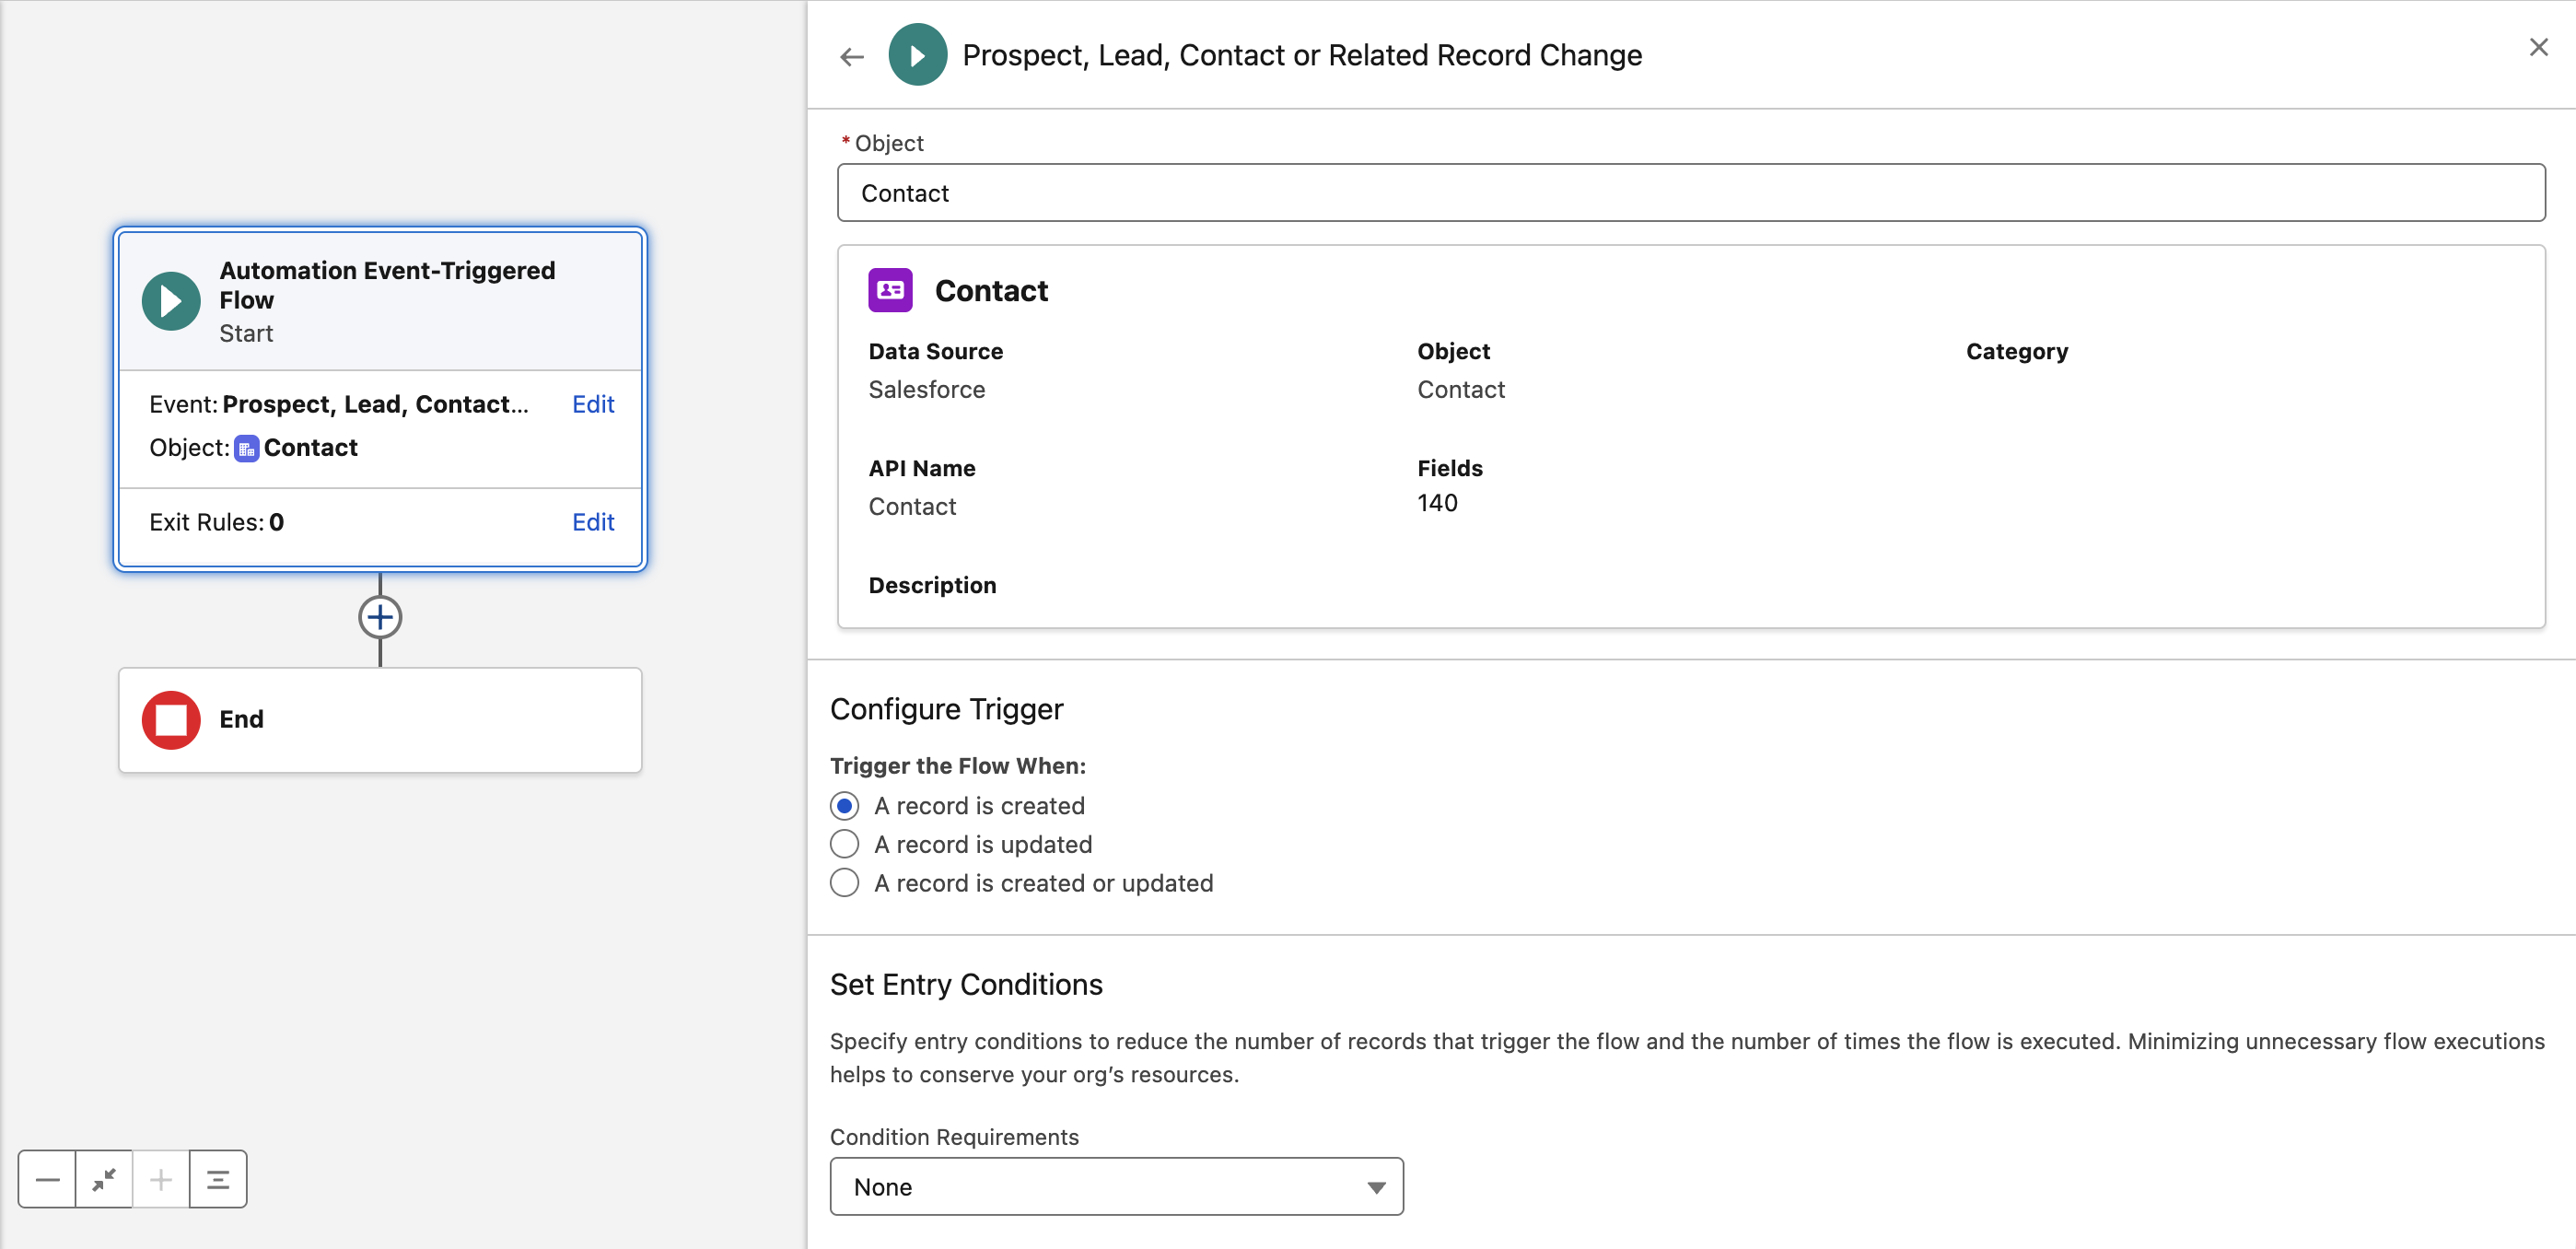
- Click the
Select Event link in the flow start element. - In the search field, enter
Prospect, Lead, Contact or Related Record Changeand select the event from the Event Library. - Search and select Contact from the Object menu.
- In the Set Entry Conditions section, select None from the Condition Requirements menu.
Create Apex-Defined Variable
In this exercise, you’ll create an Apex variable and associate it with the Apex class you created in the Create Apex Class exercise. This variable will be used to personalize your email.
- In the top navigation bar, click the Toolbox icon (the first icon on the left).
- Click New Resource.
- Select Variable from the Resource Type menu.
- Enter
ContactValuesin the API Name field. - Select Apex-Defined from the Data Type menu.
- Search and select
contactValuesfrom the Apex Class menu. - Click Done.

Add Assignment Element
You can now use an Assignment flow element to store a field value from the Contact record that initiated the flow. This value will be used to personalize the welcome email.
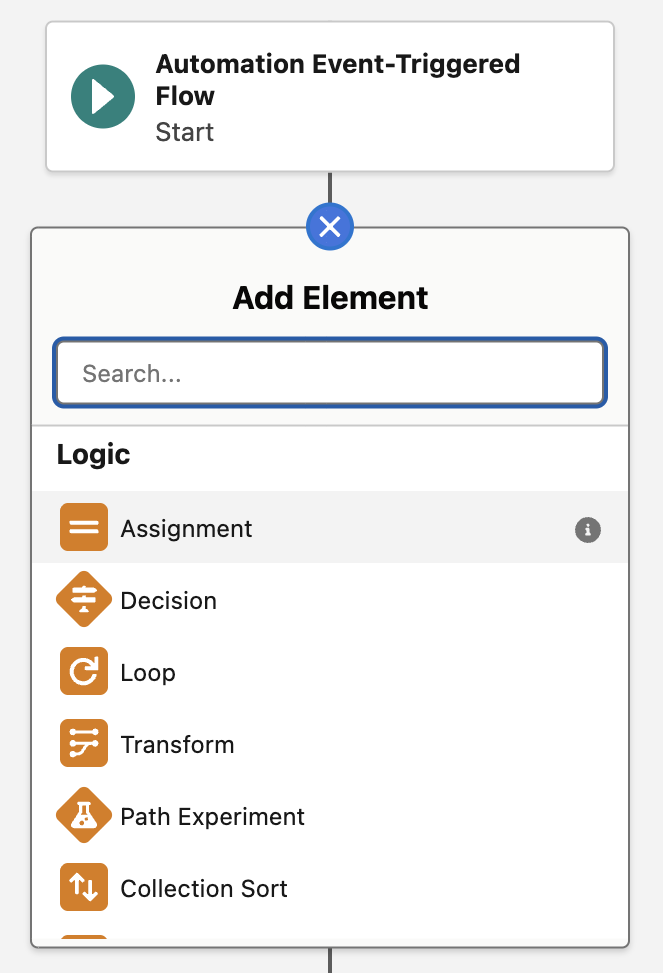
- Click the
icon on the flow canvas. - Select the Assignment element from the Logic submenu.
- Enter
Contact Valuesin the Label field. - In the Variable field, select ContactValues then firstName.
- In the Value field, select Contact from the Object submenu, then select the First Name record field.

Add Email Element
- Click the
icon under the assignment element. - Select Send Email Message.
- Enter
Send Welcome Emailin the Label field. - Click Select Email in the Select Email to Send section.
- Select the welcome email you selected in an earlier exercise and click Add.
- Scroll down in the Send Email Message panel and select a sender in the From Name and Address field.
Save and Activate Flow
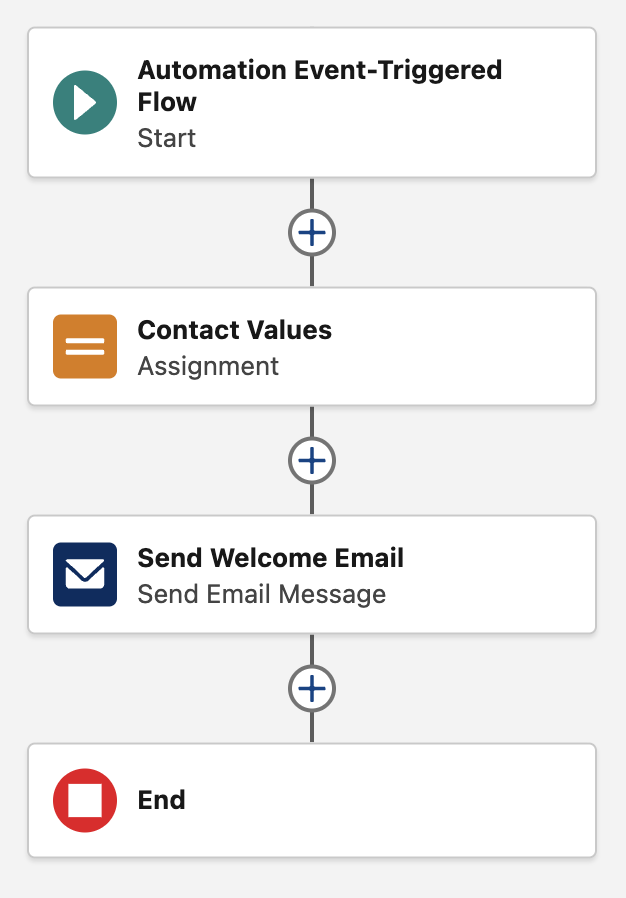
- Confirm the flow contains the following elements.
- Click Save.
- Enter
Send Welcome Email to New Contactsin the Flow Label field. - Click Save.
- Click Activate, then click Activate again.
- Click the back arrow
in the top left corner of the page to return to the Flows page.
Create a Contact
In this exercise you will create a new CRM Contact record and the Automation Event-Triggered Flow will send the welcome email in near real-time.
- Select the Contacts tab from the Marketing app.
- Click the
icon in the button group on the page and select New. - Leave Contact selected as the record type and click Next.
- Enter your contact information in the following fields:
- First Name
- Last Name
- Select any account in the Account Name field.
- Click Save.
- Check that you received the welcome email. This may take a minute to arrive.