Data Graphs
Data SpecialistFoundational~13 mins
A data graph brings together structured data from your Data Model Objects (DMOs) in Data 360 and assembles them into an easy-to-use, unified view. These graphs power personalization in Agentforce Marketing and are also used at send-time to determine the correct contact point for each individual.
In this workshop, you will create a new Data Graph, which you will then use to personalize email content in other workshops.
Create a Data Graph
- Select the Data Graphs tab from the Data Cloud app.
- Click New.
- Leave the Start from Scratch tile selected, then click Next.
- Leave the Standard Data Graph tile selected, then click Next.
- Enter the value
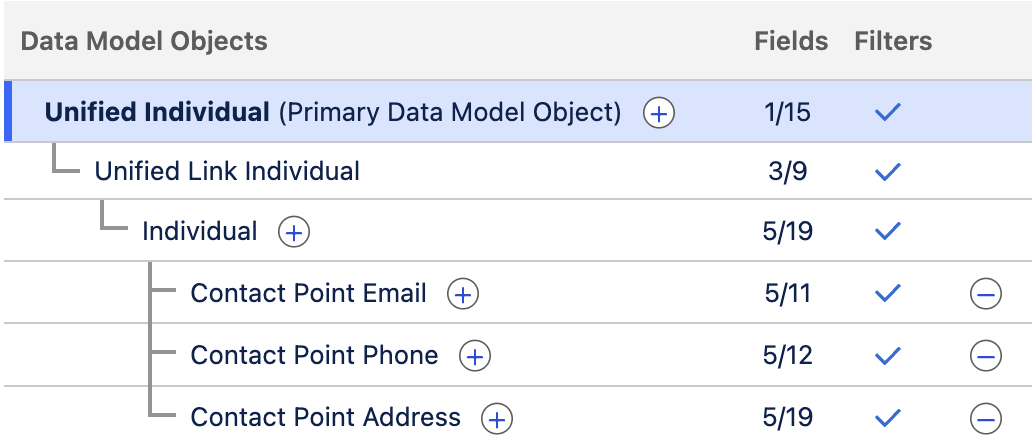
NTO Customersin the Data Graph Name field. - Select Unified Individual from the Primary Data Model Object menu.
- Click Next.
- In the Data Model Objects tree, click the
icon next to Unified Individual (Primary Data Model Object). - Select Unified Link Individual.
- Click the
icon next to Unified Link Individual. - Select Individual.
- In the Fields list, select the following fields:
- Created Date
- First Name
- Last Name
- Click the
icon next to Individual. - Select Contact Point Email then select Email Address from the fields list.
- Click the
icon next to Individual. - Select Contact Point Phone then select Telephone Number from the fields list.
- Click the
icon next to Individual. - Select Contact Point Address then select State Province from the fields list.
- Confirm the data graph structure and field count matches the screenshot below.
- Click Save and Build.
- In the Refresh Schedule modal, open the Select a Refresh Interval menu and choose Daily.
- Click Save and Build.
- From the Data Graphs page, you will note that the Last Run Status is Processing. You can click the
refresh icon in the list view toolbar to update the page. Depending on the quantity of data to process, it can take several minutes.
Preview Graph Data
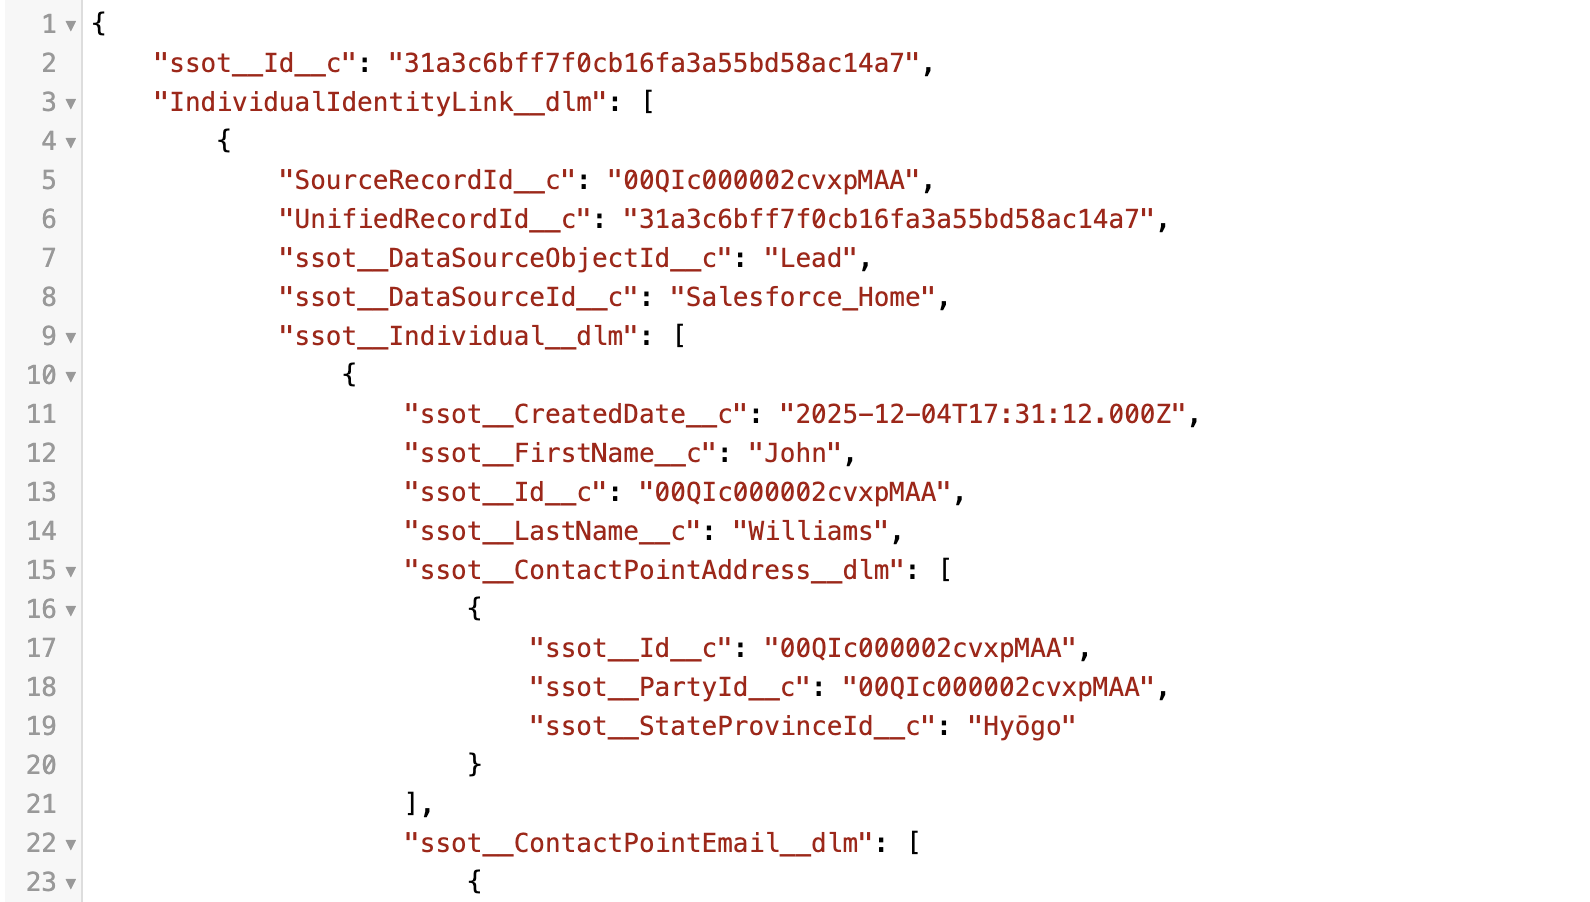
Data Graphs contain data from the Primary DMO and related objects as queryable JSON blob. In this exercise, you will preview the DMO values for the graph you created.
- Search and select
Data Explorerfrom App Launcher. - Select Data Graphs from the Object menu.
- Select NTO Customers from the Select an Object field.
- Click any View link in the Json Blob column to view the records JSON data.