Web Sitemap
Introduction
In this workshop, you will create a website sitemap using the low-code Sitemap Builder Chrome extension, which allows you to focus on defining what should be tracked on the website without needing to manage the underlying sitemap language and schema creation.
Before starting the hands-on exercises in this workshop, watch the video below to learn important sitemap concepts and components in Data 360.
Enter the password LearnSPtoday to play the video.
Configure Sitemap Builder
- Click the icon from the top setup menu and select Data Cloud Setup.
- In the quick find field, enter
Websitesand select Websites & Mobile Apps from the navigation menu. - Click the Training Site connection you created in the Sitemap workshop.
- Scroll to the bottom of the page and copy the Script URL.
- Open the demo website
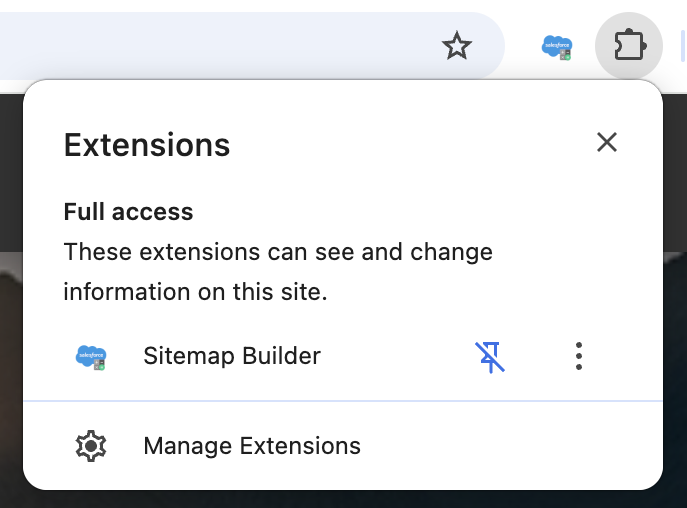
- Open the Sitemap Builder Chrome extension.
- Optionally, click the puzzle icon in your browser toolbar, then click the pin icon next to the Sitemap Builder extension to keep the extension icon visible in your toolbar.
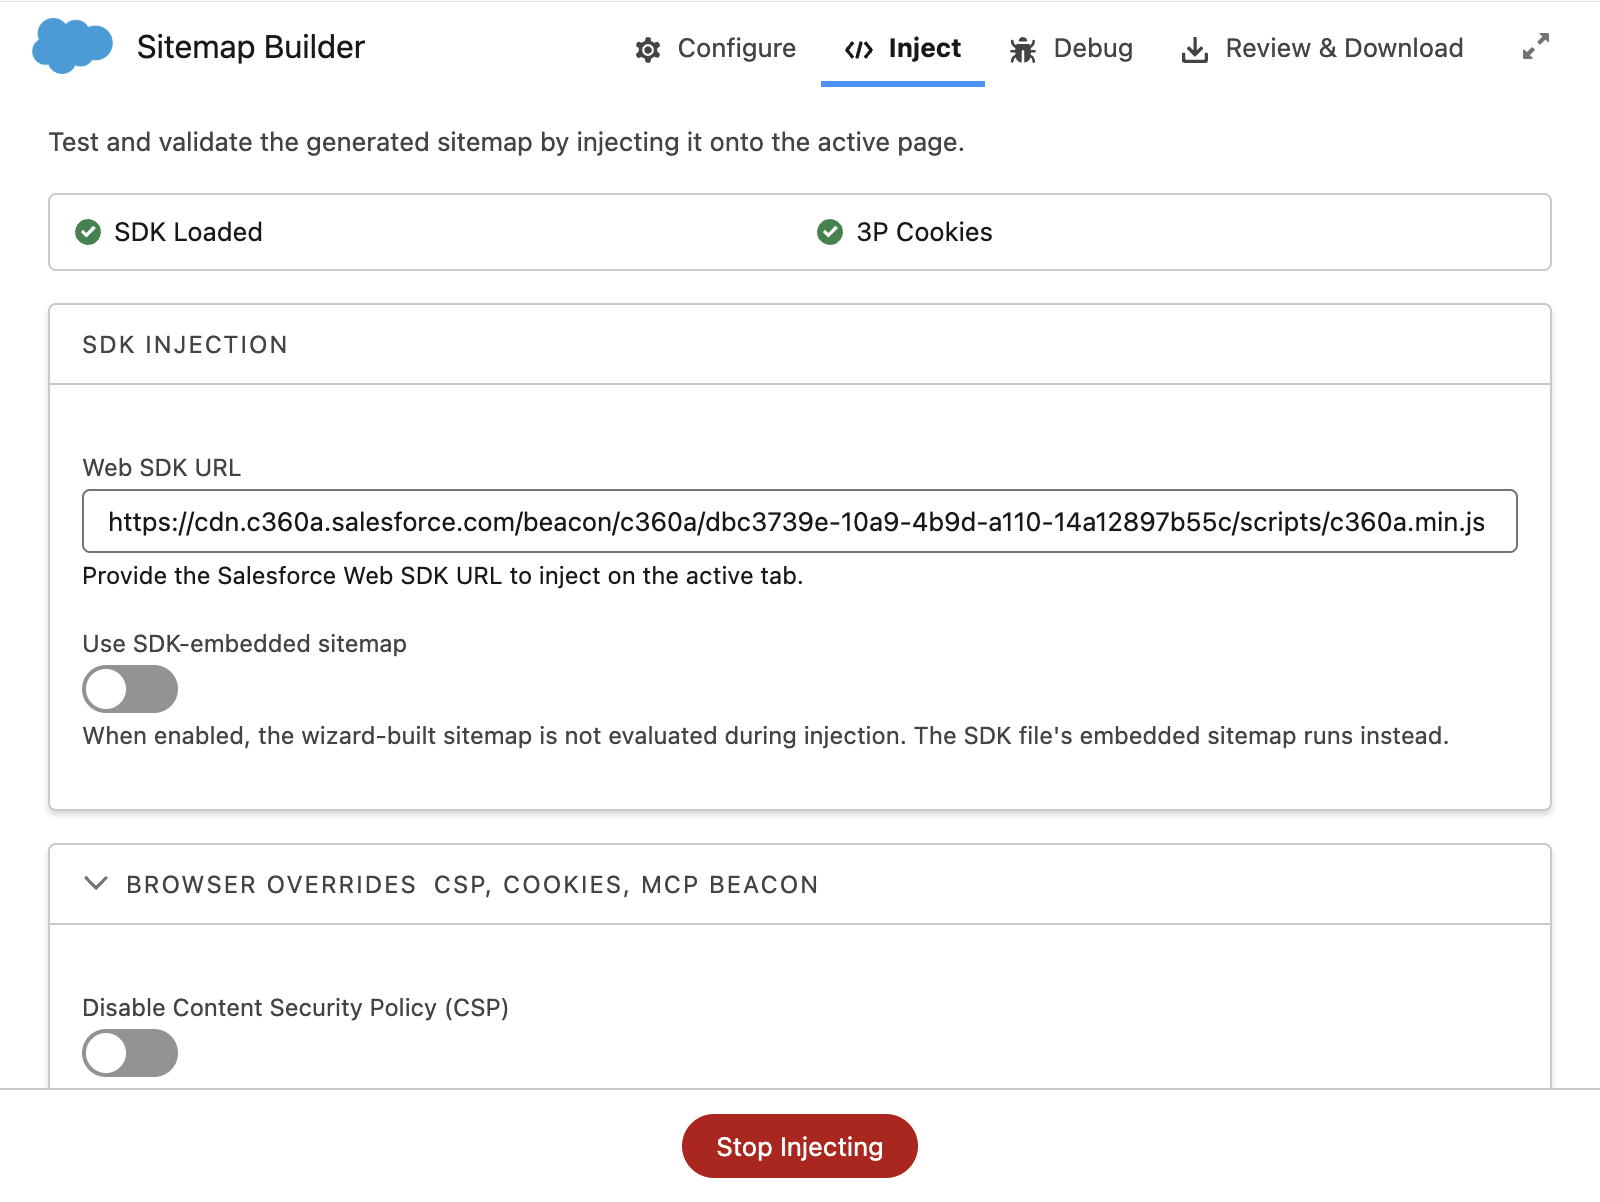
- Click the
Inject tab. - Paste the Script URL from step 4 in the Web SDK URL field.
- Click Inject.
- Click the
Configure tab. - With the Get Started tab active, select the Start from Scratch tile.
- Click Select and Start.
Mapping Consent Elements
To enable the Data 360 SDK to capture behavioral data and allow the Personalization module to return personalized decision responses, you must configure consent management and define CSS selectors that identify specific consent elements on the website.
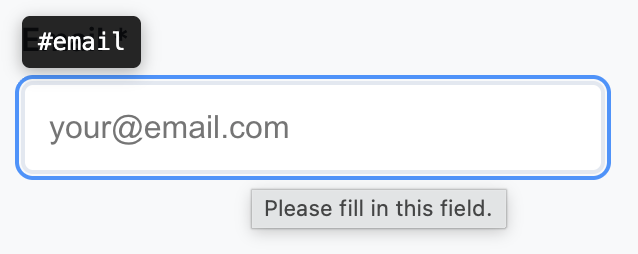
- Click the Consent link in the footer of the demo website.
- Open Sitemap Builder and click on the Consent Management tab.
- Enter
Websitein the Consent Provider Name field. - Click Save.
- Click the
Pick button next to the Opt-In Element field. - Click the green Opt In button in the website dialog to populate the Opt-In Element field with the CSS selector.
- Click Save.
- Click the
Pick button next to the Opt-Out Element field. - Click the red Opt Out button in the website dialog to populate the Opt-Out Element field.

- Click Save.
Mapping Page Types
Page types allow you to define groups of similar pages on your website so that personalization experiences can be easily targeted across all pages of the same type. Each page type can also include item data or trigger specific events that you may want to track—these will be configured in later exercises.
In this exercise, you will use Sitemap Builder to create four page types and define the url matching strategy for each page sypte.
- Open Sitemap Builder and click on the Page Types tab.
- Click
Add New Page Type. - Populate the configuration fields for the home page based on the following values:
- Name:
Home Page - Match Strategy: Includes
- Pathname:
/ - On Page Load Interaction: None
- Name:
- Click Save.
- Click
Add New Page Type. - Populate the configuration fields for product detail pages based on the following values:
- Name:
Product Detail Page - Match Strategy: Includes
- Pathname:
/product/ - On Page Load Interaction: None
- Name:
- Click Save.
- Click
Add New Page Type. - Populate the configuration fields for the cart page based on the following values:
- Name:
Cart Page - Match Strategy: Includes
- Pathname:
/cart - On Page Load Interaction: None
- Name:
- Click Save.
- Click
Add New Page Type. - Populate the configuration fields for the contact page based on the following values:
- Name:
Contact Us Page - Match Strategy: Includes
- Pathname:
/contact - On Page Load Interaction: None
- Name:
- Click Save.
- Navigate to the relevant page URLs on the website and observe how each URL’s pathname matches the pattern you defined for the corresponding page types.
Mapping Resolvers
In Salesforce Personalization, resolvers are JavaScript functions used within the Sitemap to safely extract data from a web page's Document Object Model (DOM), meta tags, or JavaScript objects. They are part of the Web SDK and allow the platform to capture specific attributes—such as product names, prices, user IDs, or page types—to build a comprehensive, real-time profile of the user.
In this exercise, you will use the Sitemap Builder to select page elements that represent the respective page attributes.
Capturing Data
This exercise uses CSS selectors to capture data for simplicity. In a typical implementation, a customer’s data layer might be a more reliable source for resolver configuration. Data points from the data layer are easily accessible via custom JavaScript.
Map Resolvers on Product Pages
- Open any product detail page on the demo website.
- Open Sitemap Builder and click on the Resolvers tab.
- Click
Add New Resolver. - Enter
Product Idin the Name field. - Leave the default values selected in the Kind, Method, and Output Type fields.
- Leave CSS Selector (text) selected in the Method field.
- Leave Text selected in the Output Type field.
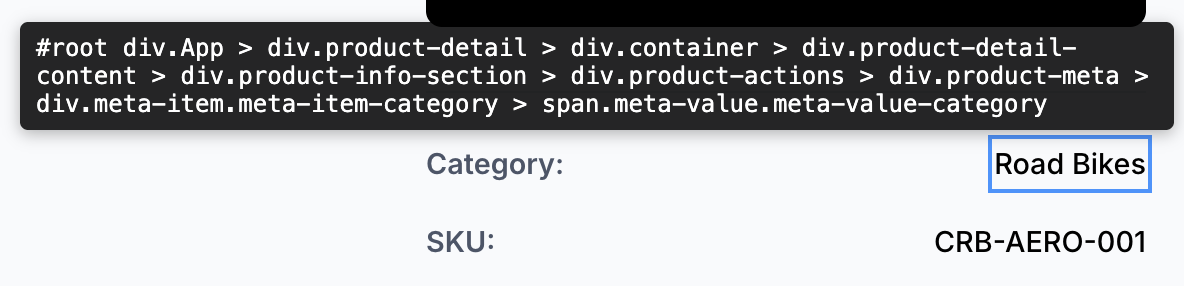
- Click the
Pick button next to the Selector field. - Select the product SKU on a product detail page (see below) to populate the selector field.

- Click Save.
- Click
Add New Resolver. - Enter
Product Namein the Name field. - Leave the default values selected in the Kind, Method, and Output Type fields.
- Click the
Pick button next to the Selector field. - Select the product name on a product detail page to populate the selector field.

- Click Save.
- Click
Add New Resolver. - Enter
Categoryin the Name field. - Leave the default values selected in the Kind, Method, and Output Type fields.
- Click the
Pick button next to the Selector field. - Select the product SKU on a product detail page to populate the selector field.
- Click Save.
- Click
Add New Resolver. - Enter
Product Pricein the Name field. - Leave Built-in selected in the Kind field.
- Leave CSS Selector (text) selected in the Method field.
- Select Number from the Output Type field.
Set Output Type
Ensure you change the Output Type to Number to ensure the product price is converted from a string to a number.
- Click the
Pick button next to the Selector field. - Select the product price on a product detail page to populate the selector field.

- Click Save.
Map Resolvers on Contact Page
- Open the Contact page on the demo website.
- Open Sitemap Builder and click on the Resolvers tab.
- Click
Add New Resolver. - Enter
Contact Namein the Name field. - Leave the default values selected in the Kind, Method, and Output Type fields.
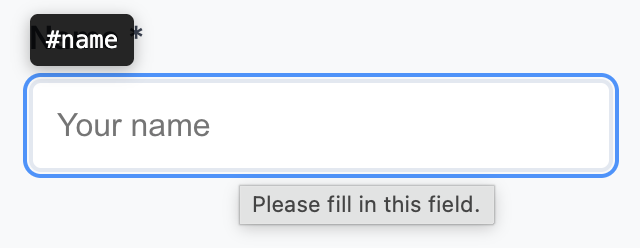
- Click the
Pick button next to the Selector field. - Select the name field in the contact form to populate the selector field.
- Click Save.
- Click
Add New Resolver. - Enter
Contact Emailin the Name field. - Leave the default values selected in the Kind, Method, and Output Type fields.
- Click the
Pick button next to the Selector field. - Select the name field in the contact form to populate the selector field.
- Click Save.
Map Resolvers on Cart Page
- Add a few products to the cart on the demo website.
- Open the cart page.
- Open Sitemap Builder and click on the Resolvers tab.
- Enter
Order Idin the Name field. - Leave the default values selected in the Kind, Method, and Output Type fields.
- Click the
Pick button next to the Selector field. - Select the order id value to populate the selector field.

- Click Save.
- Click
Add New Resolver. - Enter
Order Totalin the Name field. - Leave the default values selected in the Kind and Method fields.
- Select Number from the Output Type field.
- Click the
Pick button next to the Selector field. - Select the total value to populate the selector field.

- Click Save.
- Click
Add New Resolver. - Enter
Line Item Idin the Name field. - Click the
Pick button next to the Selector field. - Select any SKU in an order line item row to populate the selector field.

- Click Save.
- Click
Add New Resolver. - Enter
Line Item Qtyin the Name field. - Leave the default values selected in the Kind and Method fields.
- Select Number from the Output Type field.
- Click the
Pick button next to the Selector field. - Select a quantity in an order line item row to populate the selector field.

- Click Save.
- Click
Add New Resolver. - Enter
Line Item Pricein the Name field. - Leave the default values selected in the Kind and Method fields.
- Select Number from the Output Type field.
- Click the
Pick button next to the Selector field. - Select a line item price in an order line item row to populate the selector field.

- Click Save.
Create Events
With your item and profile data now defined, the next step is to map the key events a customer can perform on your website. Events can be simple—such as viewing the homepage—or more detailed—such as adding a product to the cart or completing a purchase, where each event includes item attributes you configured earlier.
Create Product View Event
In this exercise, you will use a standard event to capture product page views.
- Open Sitemap Builder and click on the Events tab.
- Click
Add New Event. - Select the Standard Event card.
- Populate the configuration fields based on the following values:
- Label:
Product View - Category: Category
- Interaction: View Catalog Object
- Catalog Object Type:
Product - ID Selector: Product Id
- Label:
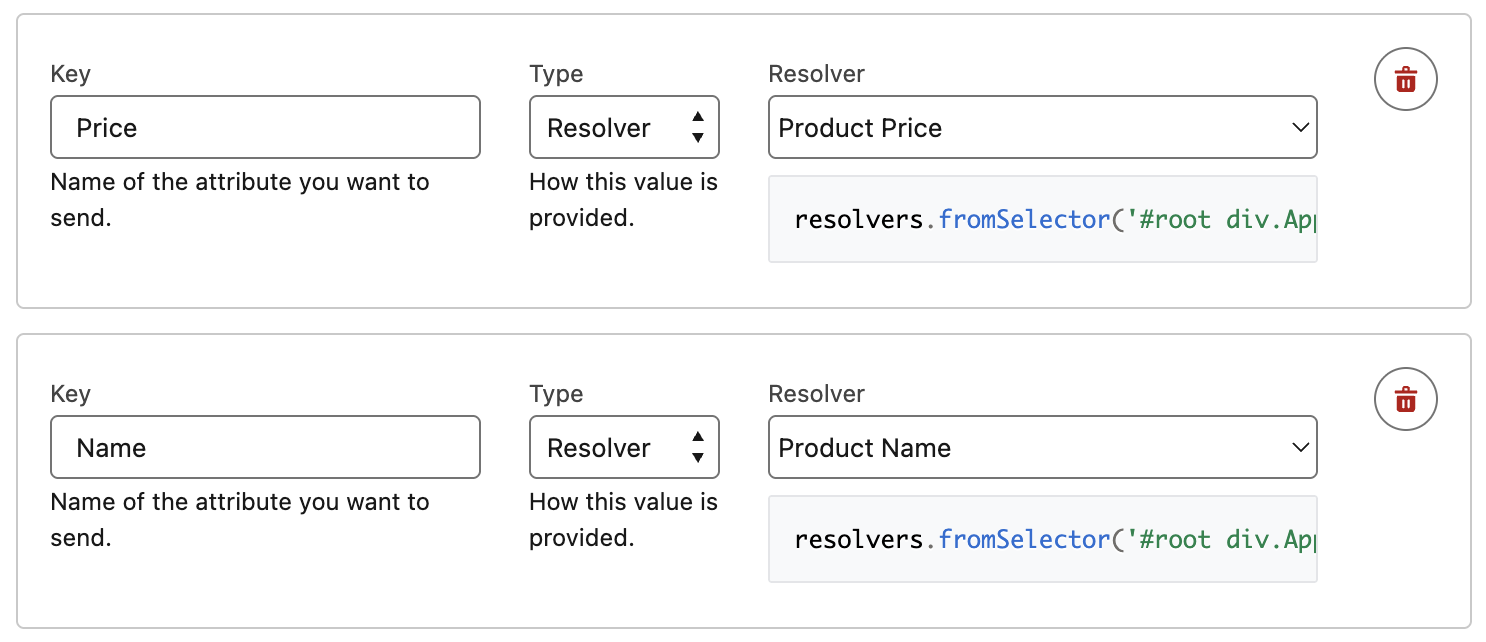
- Click Add Attribute in the Interaction Attributes section and populate the following values:
- Key:
Price - Type: Resolver
- Value: Product Price
- Key:
- Click Add Attribute and populate the following values:
- Key:
Name - Type: Resolver
- Value: Product Name
- Key:
- Scroll up and click Save.
Create Add to Cart Event
In this exercise, you will create a standard event to track add to cart events.
- Click
Add New Event. - Select the Standard Event card.
- Populate the configuration fields based on the following values:
- Label:
Add to Cart - Category: Cart
- Interaction: Add To Cart
- Catalog Object Type:
Product - Line Items Mode: Single item
- Cart ID Selector: [leave blank]
- Catalog Object Type: Product
- Catalog Object ID Resolver: Line Item Id
- Quantity Resolver: Line Item Qty
- Price Resolver: Line Item Price
- Label:
- Scroll up and click Save.
Create Purchase Event
In this exercise, you will create a standard event to track cart purchase events.
- Click
Add New Event. - Select the Standard Event card.
- Populate the configuration fields based on the following values:
- Label:
Purchase - Category: Order
- Interaction: Purchase
- Order ID Selector: Order Id
- Total Value Selector: Order Total
- Line Items Selector:
.order-item - Catalog Object Type: Line Item Id
- Catalog Object ID Resolver: Line Item Price
- Quantity Resolver: Line Item Qty
- Price Resolver: Line Item Price
- Label:
- Scroll up and click Save.
Create Contact Form Submissions Event
In this exercise, you will create a custom event to capture contact form submissions.
- Click
Add New Event. - Select the Custom Event card.
- Populate the configuration fields based on the following values:
- Label:
Form Fill - Event Type:
userEngagement
- Label:
- Click Add Attribute in the Interaction Attributes section and populate the following values:
- Key:
eventType - Type: String
- Value:
contactPointEmail
- Key:
- Click Add Attribute and populate the following values:
- Key:
email - Type: Resolver
- Value: Contact Email
- Key:
- Click Add Attribute and populate the following values:
- Key:
name - Type: Resolver
- Value: Contact Name
- Key:
- Scroll down to the Preview section and verify that the displayed code matches the example shown below. If there are any differences, update your configuration before proceeding.
{
  interaction: {
    name: "Form Fill",
    eventType: "userEngagement",
    attributes: {
      eventType: "contactPointEmail",
      email: contactemail(),
      name: contactname()
    }
  }
}- Click Save.
Using Sitemap Data Capture to Power Real-Time Identity Resolution
When building a sitemap, it’s important to identify opportunities to capture key identifiers such as an email address. Login experiences, form submissions, email capture pop-ups, and similar interactions are all effective ways to convert an anonymous visitor into a known individual—unlocking more meaningful cross-channel personalization. In a later workshop, you’ll see how the email value captured in this exercise helps fuel real-time identity resolution.