Personalization Attribution
Introduction
Salesforce Personalization logs every decision it makes to Data 360, creating a rich dataset that can be used to measure performance and understand the impact of your personalization strategies. Using this decision data, you can perform attribution and analytics through a variety of different methods.
Out-of-the-box and custom attribution models help you evaluate how effectively personalization influences customer outcomes. Experiments allow you to compare cohort performance against each other and against a control group, giving you confidence in what’s working and what can be improved. In addition, the Pipeline Intelligence Dashboard provides a high-level view of personalization activity, including usage statistics and request trends over time.
Before starting the hands-on exercises in this workshop, watch the video below to learn how attribution and analytics work in Salesforce Personalization.
Enter the password LearnSPtoday to play the video.
Build an Attribution Model
With personalization experiences now live on the demo website, you can now configure a custom attribution model to track the performance of your personalization points.
In this exercise, you’ll create an attribution model that supports a typical product recommendations use case, helping you understand how recommendation interactions contribute to downstream engagement and conversion outcomes.
Keep in mind that you configured an experiment for the product recommendations in an earlier exercise. Experiment analytics are tracked separately from attribution models, so while experiments help measure lift and performance against a control group, attribution models help you understand how recommendation interactions contribute across the broader customer journey.
Experiment Reports
An experimentation analytics report is automatically generated to highlight metrics such as lift over control and confidence intervals. You can access this report by opening the experiment (from the Experiments tab) and viewing the Analytics tab.
Note: The experimentation analytics report will only populate once users interact with the experiment. To view results in your SDO, you’ll need to simulate website traffic and engage with the experience so data can begin flowing into the report.
Create Engagement Signal
To build an attribution model, you’ll first create an additional engagement signal that will serve as the entry point for the attribution model funnel.
- Search and select
Engagement Signalsfrom App Launcher. - Click New.
- Leave the Exclude related objects... checkbox deselected.
- Select Product Browse Engagement from the Engagement DMO menu.
- Click Next.
- Select the following identifiers from the Product Browse Engagement DMO in each respective field:
| Field | Identifier | Field Purpose |
|---|---|---|
| User Identifier | Individual | Who did the event |
| Timestamp Identifier | Engagement Date Time | When the event happened |
| Item Identifier | Product | What item the event was against |
| Event Identifier | Product Browse Engagement Id | Understand multiple occurrences of the same event |
- Click Next.
- Leave the Count each event as a discrete engagement signal tile selected and click Next.
- Click
Add Condition on the Set Additional Requirements screen. - Select Product Browse Engagement > Engagement Channel Action from the Resource menu.
- Select Is Equal To from the Operator menu.
- Enter
Clickin the Value field.
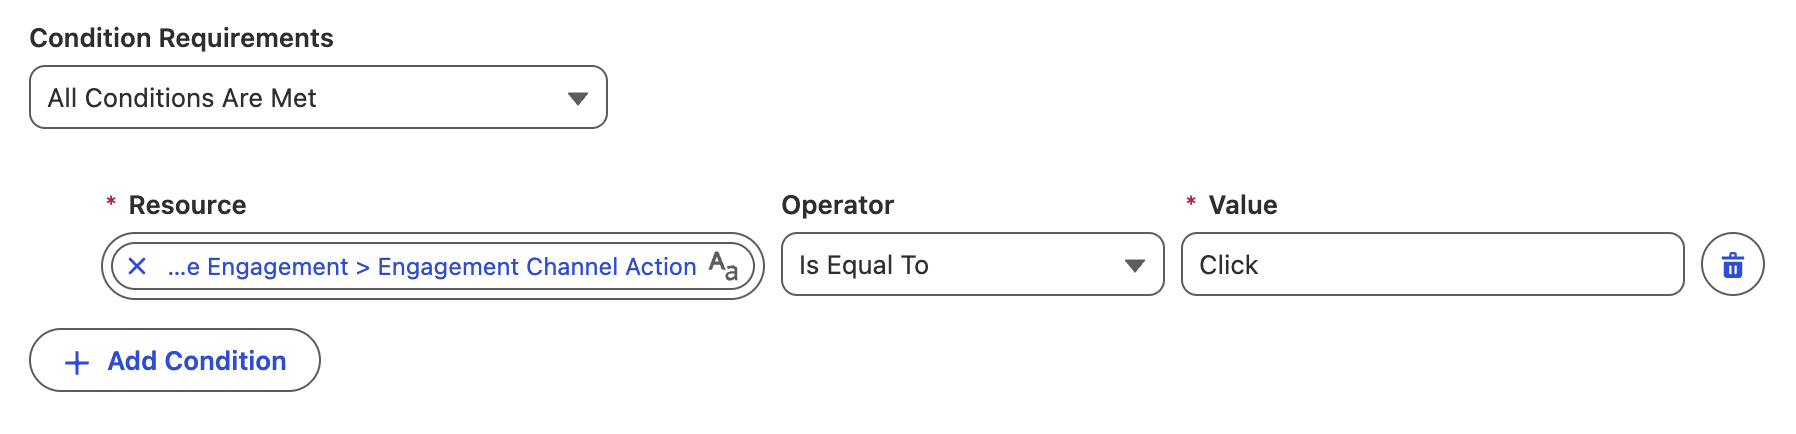
Condition Requirement
For the engagement signal to increment, records added to the Product Browse Engagement DMO must include an action name value of 'Click'.
- Click Next.
- Enter
Product Rec Clickin the engagement signal Name field. - Click Save.
Configure Attribution Model
With your engagement signal created, you can now create and configure an attribution model.
- Search and select
Personalizationfrom App Launcher. - Click on the Attributions tab.
- Click New.
- Complete the Attribution Model Properties fields with the following values:
- Data Space: default
- Identity Resolution Ruleset: RT Unified Individuals (that you created in the Identity Resolution workshop).
- Attribution Model API Name:
ProductRecs.
- Click Next.
- Select Last Touch as the Attribution Model Type.
- Select 7 days as the Attribution Window.
Attribution Model Types and Attribution Windows
Which attribution type you use depends on how you want to assign credit for user engagement when multiple engagements qualify. First Touch attributes business Key Performance Indicators (KPIs) to the initial individual engagement. Last Touch attributes business KPIs to the final individual engagement.
The attribution window is the maximum allowed time between two engagements for a conversion to occur. For example, if an individual interacts with recommended content and then makes a purchase within the attribution window, the system attributes the resulting revenue to the personalization point. Purchases that occur outside the attribution window are not included in attribution reporting.
- Click Next.
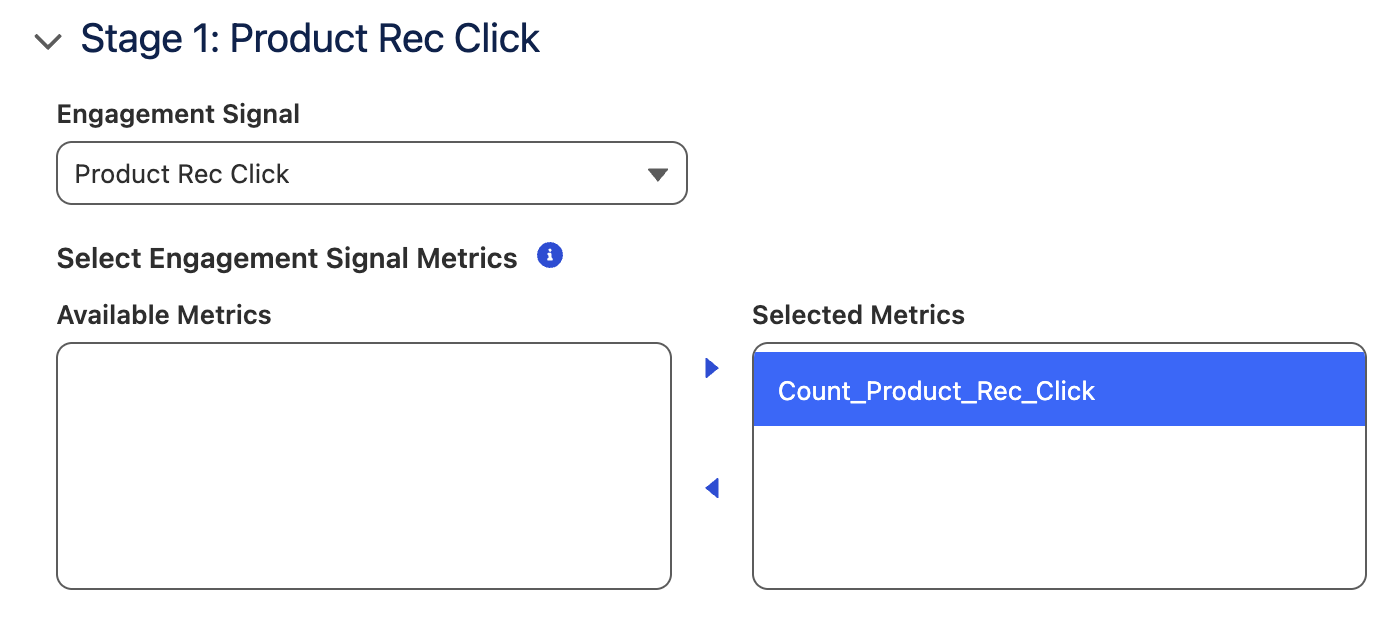
- Select the Product Rec Click from the Engagement Signal menu.
- Select Count_Product_Rec_Click from Available Metrics, then click
to add the metric to the Selected Metrics list.
- Click
New Stage. - Select Add to Cart from the Engagement Signal menu.
- Enable the Content Match checkbox.
Funnel Stages and Content Match
The funnel is a strategic model that mirrors stages (key touch points) of a personalization journey. You define each stage by selecting an engagement signal and relevant metrics. The order you create stages in reflects funnel engagement from start to finish. For example, click on a product page, add it to cart, and purchase it.
When content match is enabled, individuals only progress to this stage when the ID of the content that they’re engaging with matches the ID of the content that they engaged in the previous stage.
- Select Count_Add_to_Cart from Available Metrics, then click
to add the metric to the Selected Metrics list. - Click
New Stage. - Select Purchase from the Engagement Signal menu.
- Enable the Content Match checkbox.
- Select Count_Purchase from Available Metrics, then click
to add the metric to the Selected Metrics list. - Click Save & Enable.
- Enter
ProductRecPointin the Personalization Point Output DMO API Name field. - Enter
ProductRecContentin the Personalization Point Content Output DMO API Name field. - Click Enable.

Attribution Data Model Objects
The attribution model uses two separate Data Model Objects (DMOs) to gather attribution data for each engaged personalization point. For personalization point–level attribution, the model references the Personalization Point Output DMO. For content-level attribution, it references the Personalization Point Content Output DMO.
Using the Personalization Attribution Intelligence Dashboard
Once attribution data is available, you can use the Attribution Intelligence dashboard to view funnel stage conversions for a selected attribution model, along with analytic totals for each stage.
To access the dashboard, open an attribution model from the Attributions page and select the Analytics tab. The dashboard will only populate once users interact with the personalization points.
Additional Resources
- Salesforce Personalization Analytics
- Attribution & Analytics (Videos) (use password
LearnSPtoday)