Recommenders
Introduction
Recommenders generate individualized product and content recommendations using rich behavioral, digital, and offline context data across channels. To deliver these personalized experiences in Salesforce Personalization, you configure a recommender and train it using selected Data 360 data graphs, which provide the customer, engagement, and business context that powers recommendation logic.
Before starting the hands-on exercises in this workshop, watch the video below to learn more about recommenders and the differences between objective-based and rules-based recommenders.
Enter the password LearnSPtoday to play the video.
Create a Rules-Based Recommender
In this first exercise, you’ll create a rules-based Top Sellers recommender and use it in a personalization point to deliver cross-channel personalized decisions based on product popularity.
- Search and select
Personalizationfrom App Launcher. - Click on the Recommenders tab.
- Click New.
- Complete the Recommender Properties fields with the following values:
- Data Space: default
- Profile Data Graph: Profile (that you created in the Profile Data Graphs workshop).
- Item Data Graph: Products (that you created in the Item Data Graphs workshop).
- Recommender Name:
Top Sellers - Recommender API Name:
Top_Sellers
- Click Next.
- Select the Rule-Based Recommendations tile and click Next.
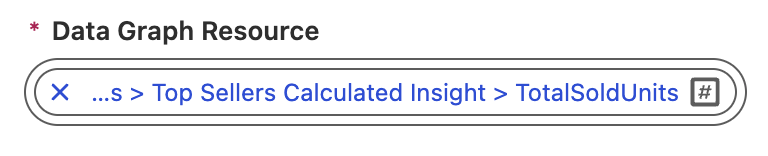
- Select Calculated Insights > Top Sellers Calculated Insight > TotalSoldUnits from the Data Graph Resource menu.
- Set the Sort Order as Descending.
- Click Next.
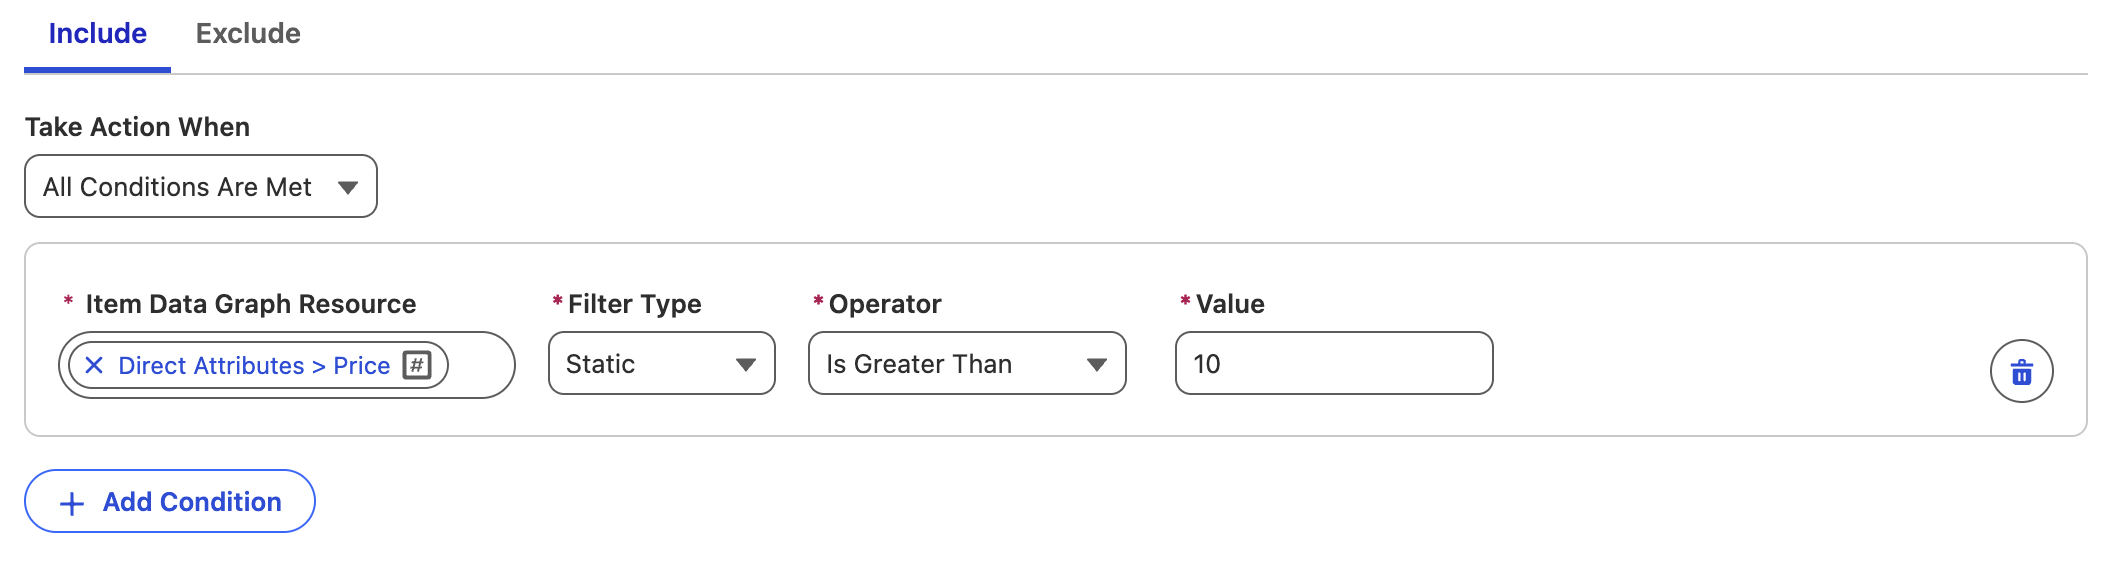
- Click
Add Condition in the Filters dialog. - Select Direct Attributes > Price from the Item Data Graph Resource menu.
- Select Static from the Filter Type menu.
- Select Is Greater Than from the Operator menu.
- Enter the value
10in Value field.
- Click Save & Exit to save the recommender and start training.
Engagement Signals
Before creating an objective-based recommender, you will first create an engagement signal that will be used by the recommender in Salesforce Personalization.
Engagement signals act as both the input for model training and the foundation for the metrics that a recommender can optimize (maximize or minimize). To identify effective engagement signals, focus on the key user actions related to the item being recommended that contribute to your desired outcome.
For example, when building a maximize revenue recommender, relevant engagement signals typically include product views, add-to-cart events, and purchases, as these actions indicate increasing levels of purchase intent and value.
Watch the video below to learn about engagement signals, engagement signal metrics, and compound engagement signal metrics, and how they are used in the platform.
Enter the password LearnSPtoday to play the video.
Create a Product View Engagement Signal
- Search and select
Engagement Signalsfrom App Launcher. - Click New.
- Leave the Exclude related objects... checkbox deselected.
- Select Product Browse Engagement from the Engagement DMO menu.
- Click Next.
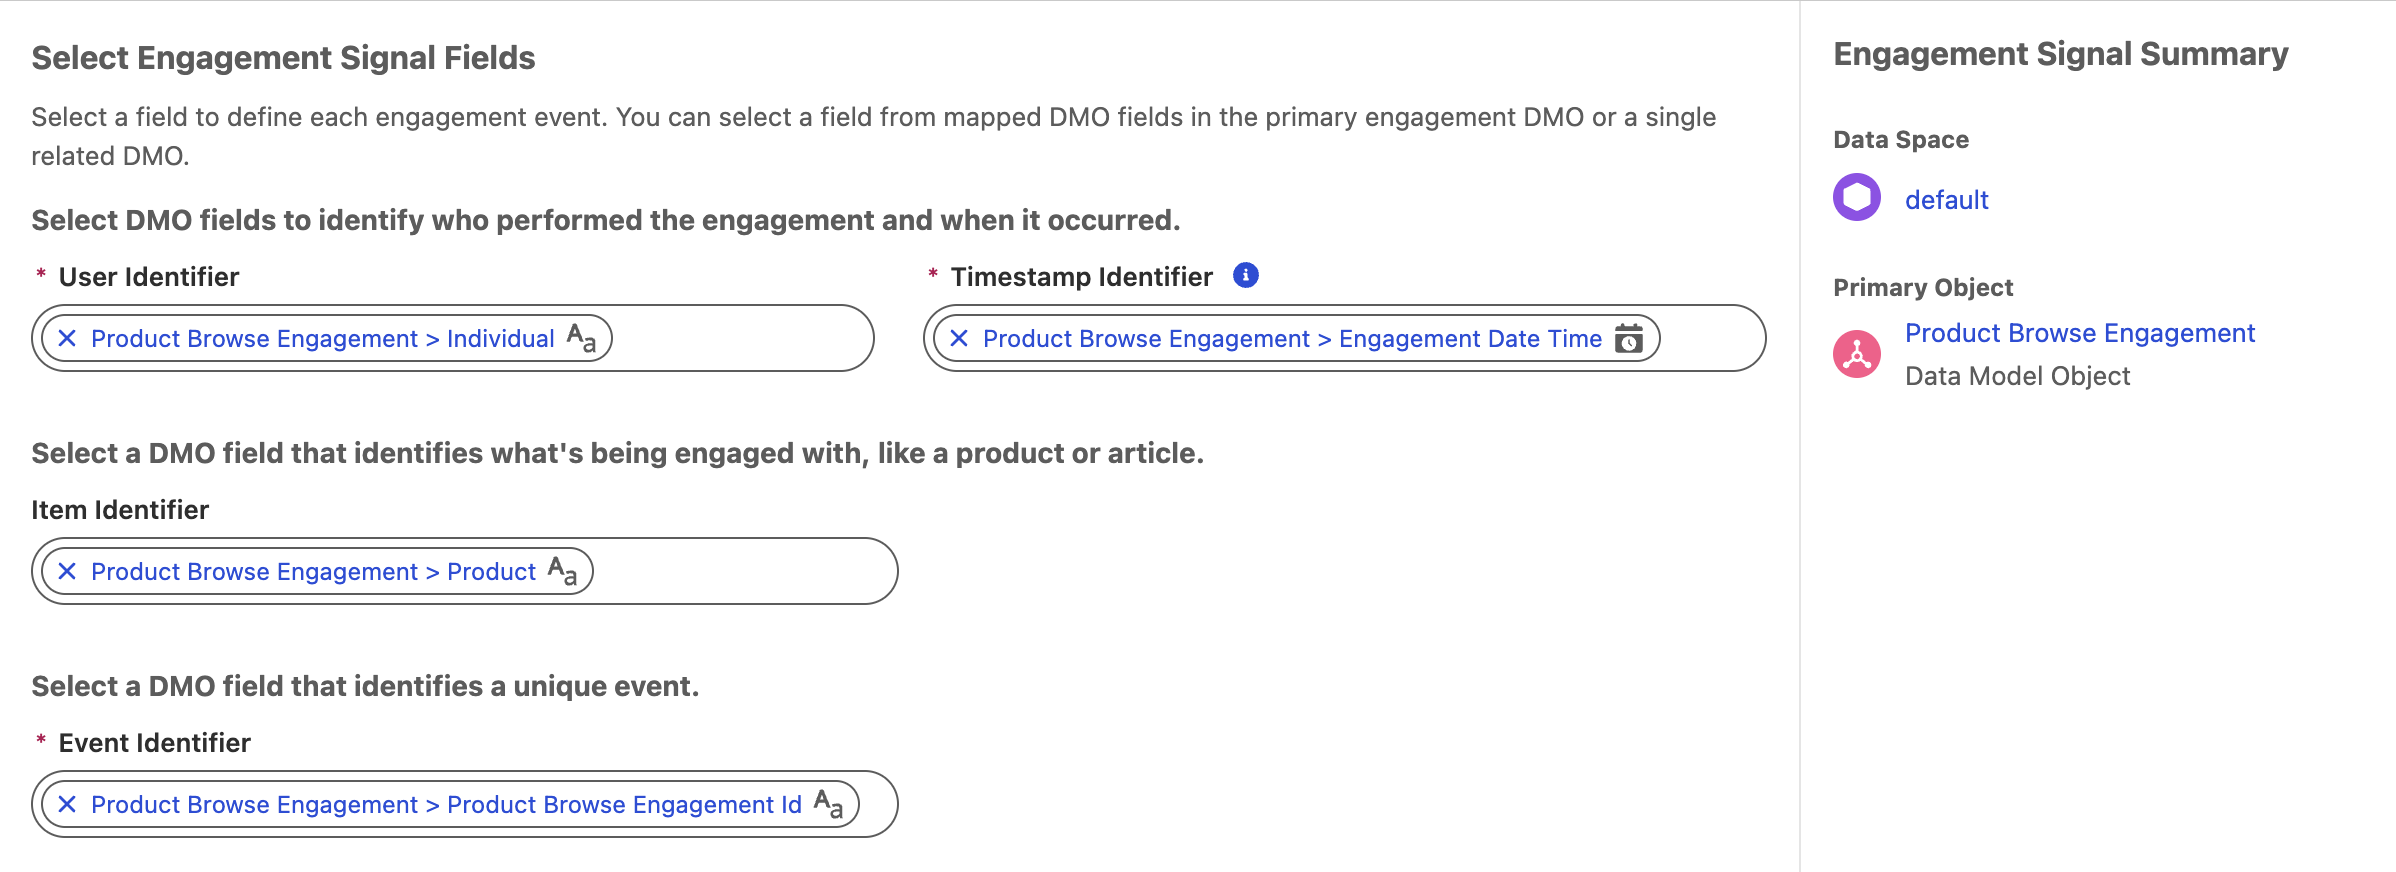
- Select the following identifiers from the Product Browse Engagement DMO in each respective field:
| Field | Identifier | Field Purpose |
|---|---|---|
| User Identifier | Individual | Who did the event |
| Timestamp Identifier | Engagement Date Time | When the event happened |
| Item Identifier | Product | What item the event was against |
| Event Identifier | Product Browse Engagement Id | Understand multiple occurrences of the same event |
- Click Next.
- Leave the Count each event as a discrete engagement signal tile selected and click Next.
- No optional filters are required, so click Next.
- Enter
Product Viewin the engagement signal Name field. - Click Save.
Create an Add to Cart Engagement Signal
- Click New from the Engagement Signals page.
- Leave the Exclude related objects... checkbox deselected.
- Select Shopping Cart Product Engagement from the Engagement DMO menu.
- Click Next.
- Select the following identifiers from the Shopping Cart Product Engagement DMO in each respective field:
| Field | Identifier | Field Purpose |
|---|---|---|
| User Identifier | Individual | Who did the event |
| Timestamp Identifier | Engagement Date Time | When the event happened |
| Item Identifier | Product | What item the event was against |
| Event Identifier | Shopping Cart Product EngagementId | Understand multiple occurrences of the same event |
- Click Next.
- Leave the Count each event as a discrete engagement signal tile selected and click Next.
- No optional filters are required, so click Next.
- Enter
Add to Cartin the engagement signal Name field. - Click Save.
Create a Purchase Engagement Signal
- Click New from the Engagement Signals page.
- Leave the Exclude related objects... checkbox deselected.
- Select Sales Order Product Engagement from the Engagement DMO menu.
- Click Next.
- Select the following identifiers from the Sales Order Product Engagement DMO in each respective field:
| Field | Identifier | Field Purpose |
|---|---|---|
| User Identifier | Individual | Who did the event |
| Timestamp Identifier | Engagement Date Time | When the event happened |
| Item Identifier | Product | What item the event was against |
| Event Identifier | Sales Order Product Engagement Id | Understand multiple occurrences of the same event |
- Click Next.
- Leave the Count each event as a discrete engagement signal tile selected and click Next.
- No optional filters are required, so click Next.
- Enter
Purchasein the engagement signal Name field. - Click Save.
Create an Engagement Signal Metric
For each engagement signal that is created, a simple count metric is automatically generated (for example, the number of purchase events recorded). These metrics can be used directly as objectives in recommenders. For instance, using the default count metric, you could configure a recommender to maximize the number of purchase events.
In this exercise, you will go a step further by creating a more meaningful business objective. Instead of optimizing for the number of purchases alone, you will create an additional metric that optimizes for the revenue value associated with orders, enabling the recommender to prioritize higher-value outcomes rather than just higher activity levels.
- Open the Purchase Engagement Signal created by the data kit.
- Click on the Related tab.
- Click New in the Engagement Signal Metrics section.
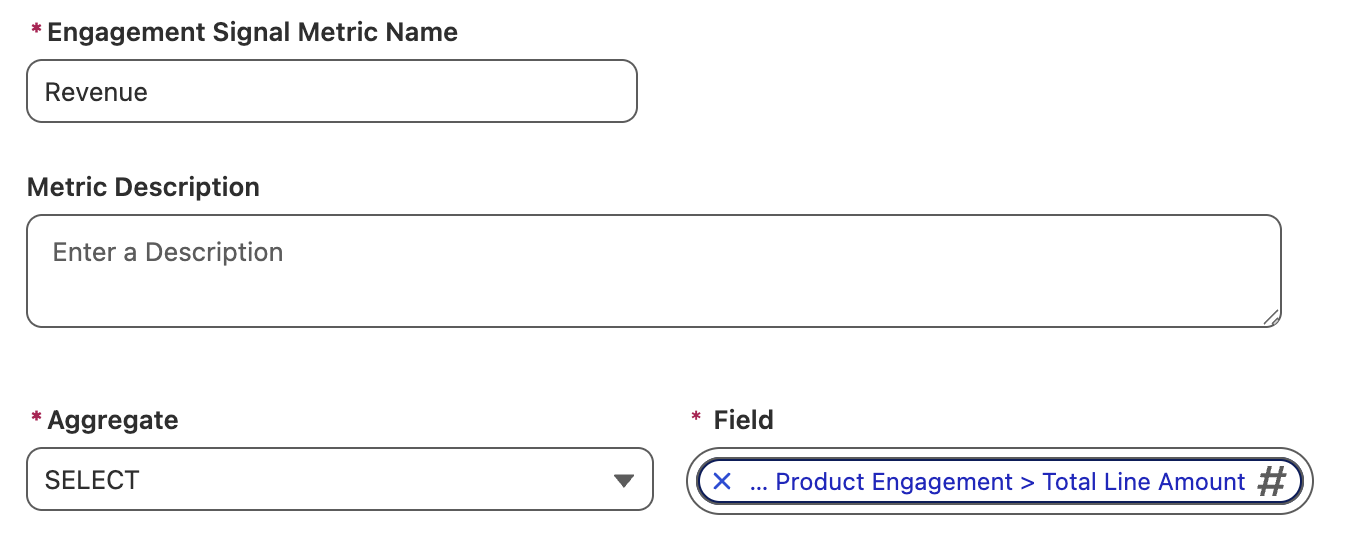
- Enter
Revenuein the Engagement Signal Metric Name field. - Choose SELECT from the Aggregate menu.
- Select Sales Order Product Engagement > Total Line Amount from the Field menu.
- Click Save.
Supported Metric Types for Recommender Objectives
Metrics created using either the COUNT or SELECT aggregate functions can be used as objectives in recommenders.
Create an Objective-Based Recommender
Now that you have created engagement signals an engagment signals metric, you can build a custom objective-based recommender. While Salesforce Personalization provides two default objectives out of the box—Maximize Revenue and Maximize Clicks—this exercise walks you through how to design your own objective-based recommendation strategy from the ground up.
You will define engagement signals, configure supporting metrics, and create a recommender that uses these components to optimize recommendations against a custom business objective. This will help you understand how objective-based strategies work and how they can be tailored to support specific personalization goals.
- Click on the Recommenders tab in the Personalization app.
- Click New.
- Complete the Recommender Properties fields with the following values:
- Data Space: default
- Profile Data Graph: Profile (that you created in the Profile Data Graphs workshop).
- Item Data Graph: Products (that you created in the Item Data Graphs workshop).
- Recommender Name:
Max Rev - Recommender API Name:
Max_Rev
- Click Next.
- Select the Objective-Based Recommendations tile and click Next.
- Select the New objective radio button.
- Complete the Objective Properties fields with the following values:
- Objective Name:
Max Rev - Objective API Name:
Max_Rev - Recommender Purpose: Maximize
- Engagement Signal Metric: [Purchase] Revenue
- Objective Name:
- Click Next.
- Add all engagement signals from the Engagement Signals menu.

- Click Next.
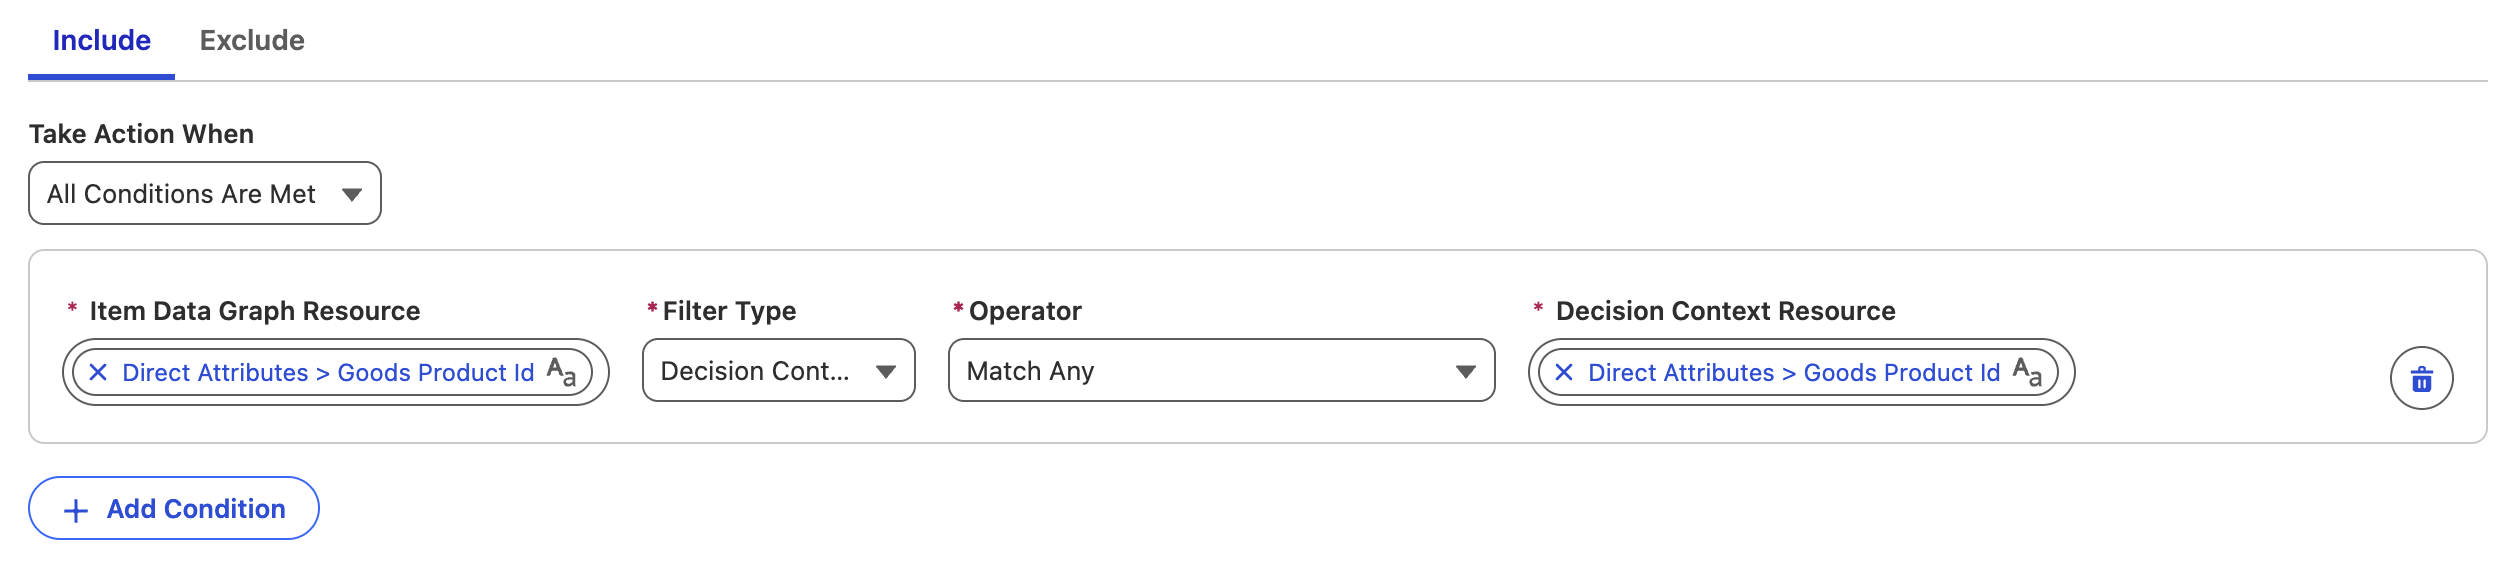
- Click
Add Condition in the Filters dialog. - Select Direct Attributes > Goods Product Id from the Item Data Graph Resource menu.
- Select Decision Context from the Filter Type menu.
- Select Match Any from the Operator menu.
- Select Direct Attributes > Goods Product Id from the Decision Context Resource menu.
- Click Save & Exit to save the recommender and start training.
Additional Resources
- Creating and Training Salesforce Personalization Recommenders
- Filter Recommendations Using Dynamic Context Variables (Video*)
- Recommendations Simulator (Video*)
- Profile Based Recs Sorting - Recently Viewed (Video*)
- Top X Bottom Y Filters (Video*)
- Multi-Locale Recommendations (Video*)
* Use the password LearnSPtoday to play videos.