Setup Marketing Intelligence
Marketing Intelligence is a marketing analytics solution that leverages the power of Data 360, Agentforce, Einstein AI, and Tableau Next to connect, harmonize, and transform third-party marketing performance data into actionable insights. It enables marketers and agents to optimize campaign spend and performance faster—without the manual effort.
This workshop guides you through the steps to install and configure Marketing Intelligence on a Simple Demo Org (SDO).
Setup User Permission Sets
- In the Setup quick find field, enter
Usersand select Users from the Users menu. - Select Active Users from the View menu.
- Locate the row with your user account and click on your name.
- Click Permission Set Assignments from the top menu to locate the Permission Set Assignments section.
- Click Edit Assignments.
- From the Available Permission Sets list, select Personalization Admin then click Add
- Click Save.
- If you are prompted that the selected permission sets include community settings, click OK.
Install Marketing Intelligence
- Before starting this exercise, make sure you’ve completed the Setup Demo Org workshop.
- Click on the icon and click the first Setup menu item.
- In the Quick Find field, enter
Marketing Intelligence, then select Marketing Intelligence from the Marketing menu. - In the Setup Prerequisites section, click Policy Confirmed.
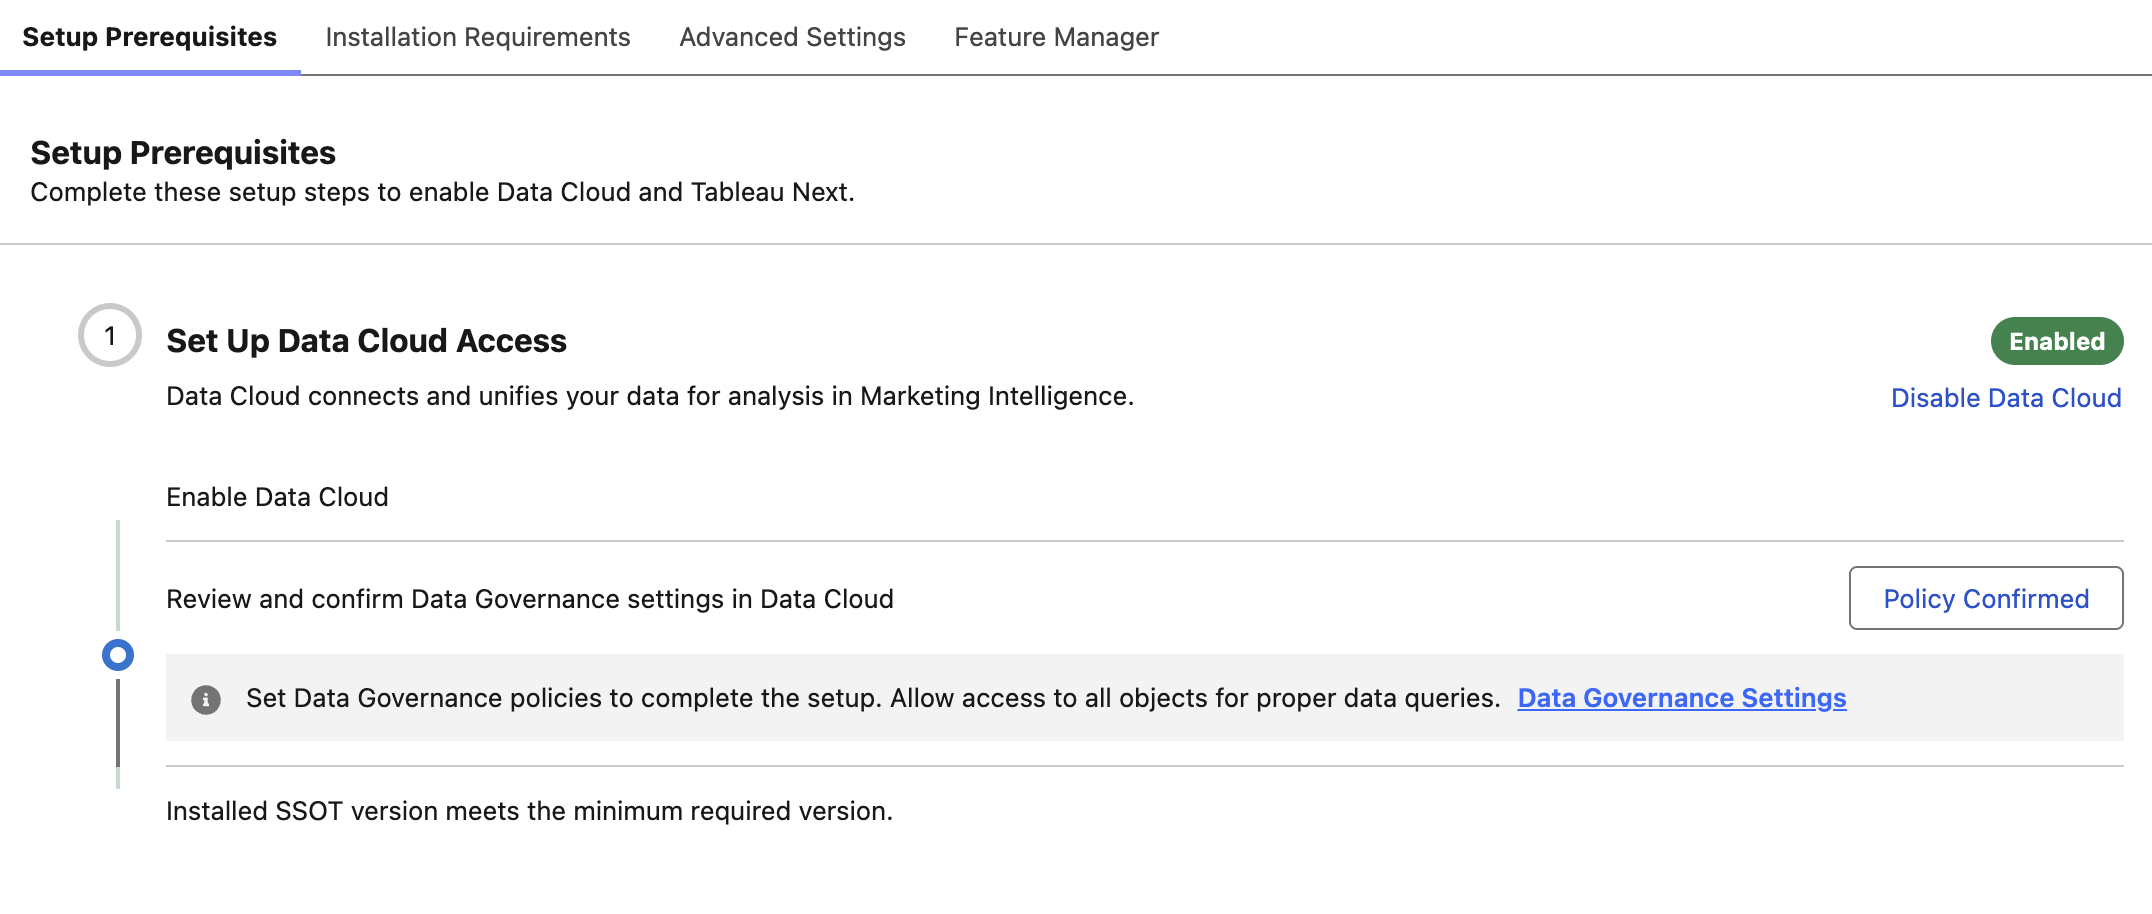
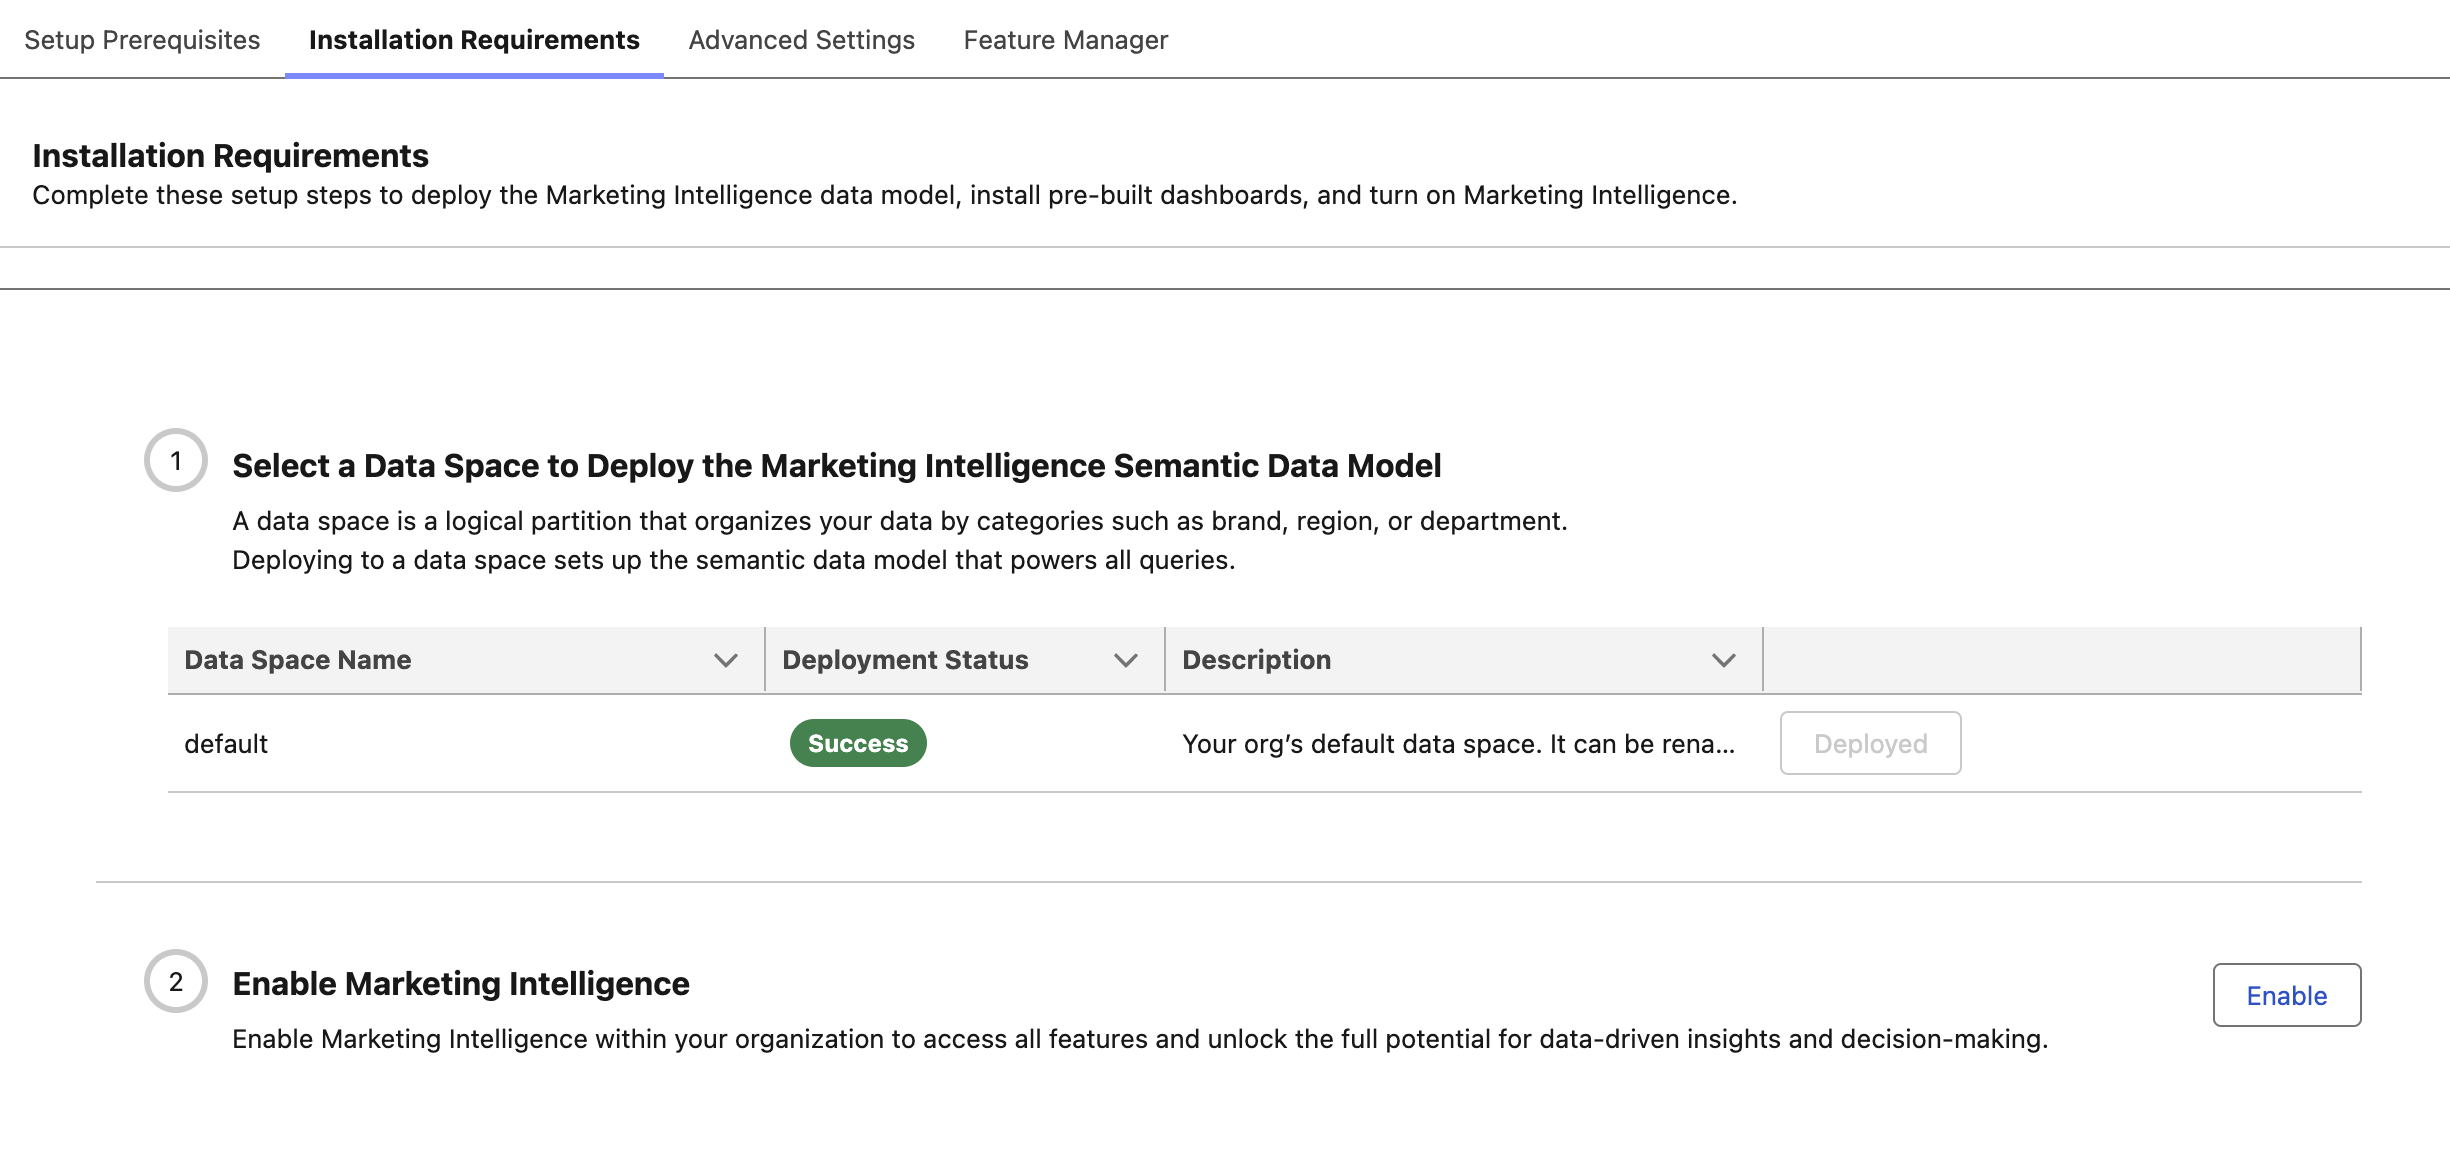
- Click on the Installation Requirements tab.
- Click Deploy in to deploy the Marketing Intelligence Semantic Data Model to the default data space.
- Wait for the deployment process to complete. This may take a few minutes.
- Click Enable to enable Marketing Intelligence.
- Click the
icon in the top right corner of the confirmation modal.
Configure Settings and Features (Optional)
The following settings aren’t required to use Marketing Intelligence, but completing this exercise is recommended to help you become familiar with the available settings and features.
- In the Quick Find field, enter
Einstein Setup, then select Einstein Setup from the Einstein Generative AI menu. - If Turn on Einstein is set to Off, toggle it to On.
- In the Quick Find field, enter
Marketing Intelligence, then select Marketing Intelligence from the Marketing menu. - Click the Advanced Settings tab.
- Click the Customize Your Marketing Intelligence Experience heading, if the section is collapsed.
- Select any menu item from the Business Type menu.
- Select any menu item from the Industry menu.
Customizing Marketing Intelligence Experience
Selecting a business type and industry tailors your reports and summaries to relevant industry benchmarks.
- Click Enable in the Enable Einstein LLM Gateway step (if the button is not disabled).
- Click Enable in the Enable Creative Assets step.
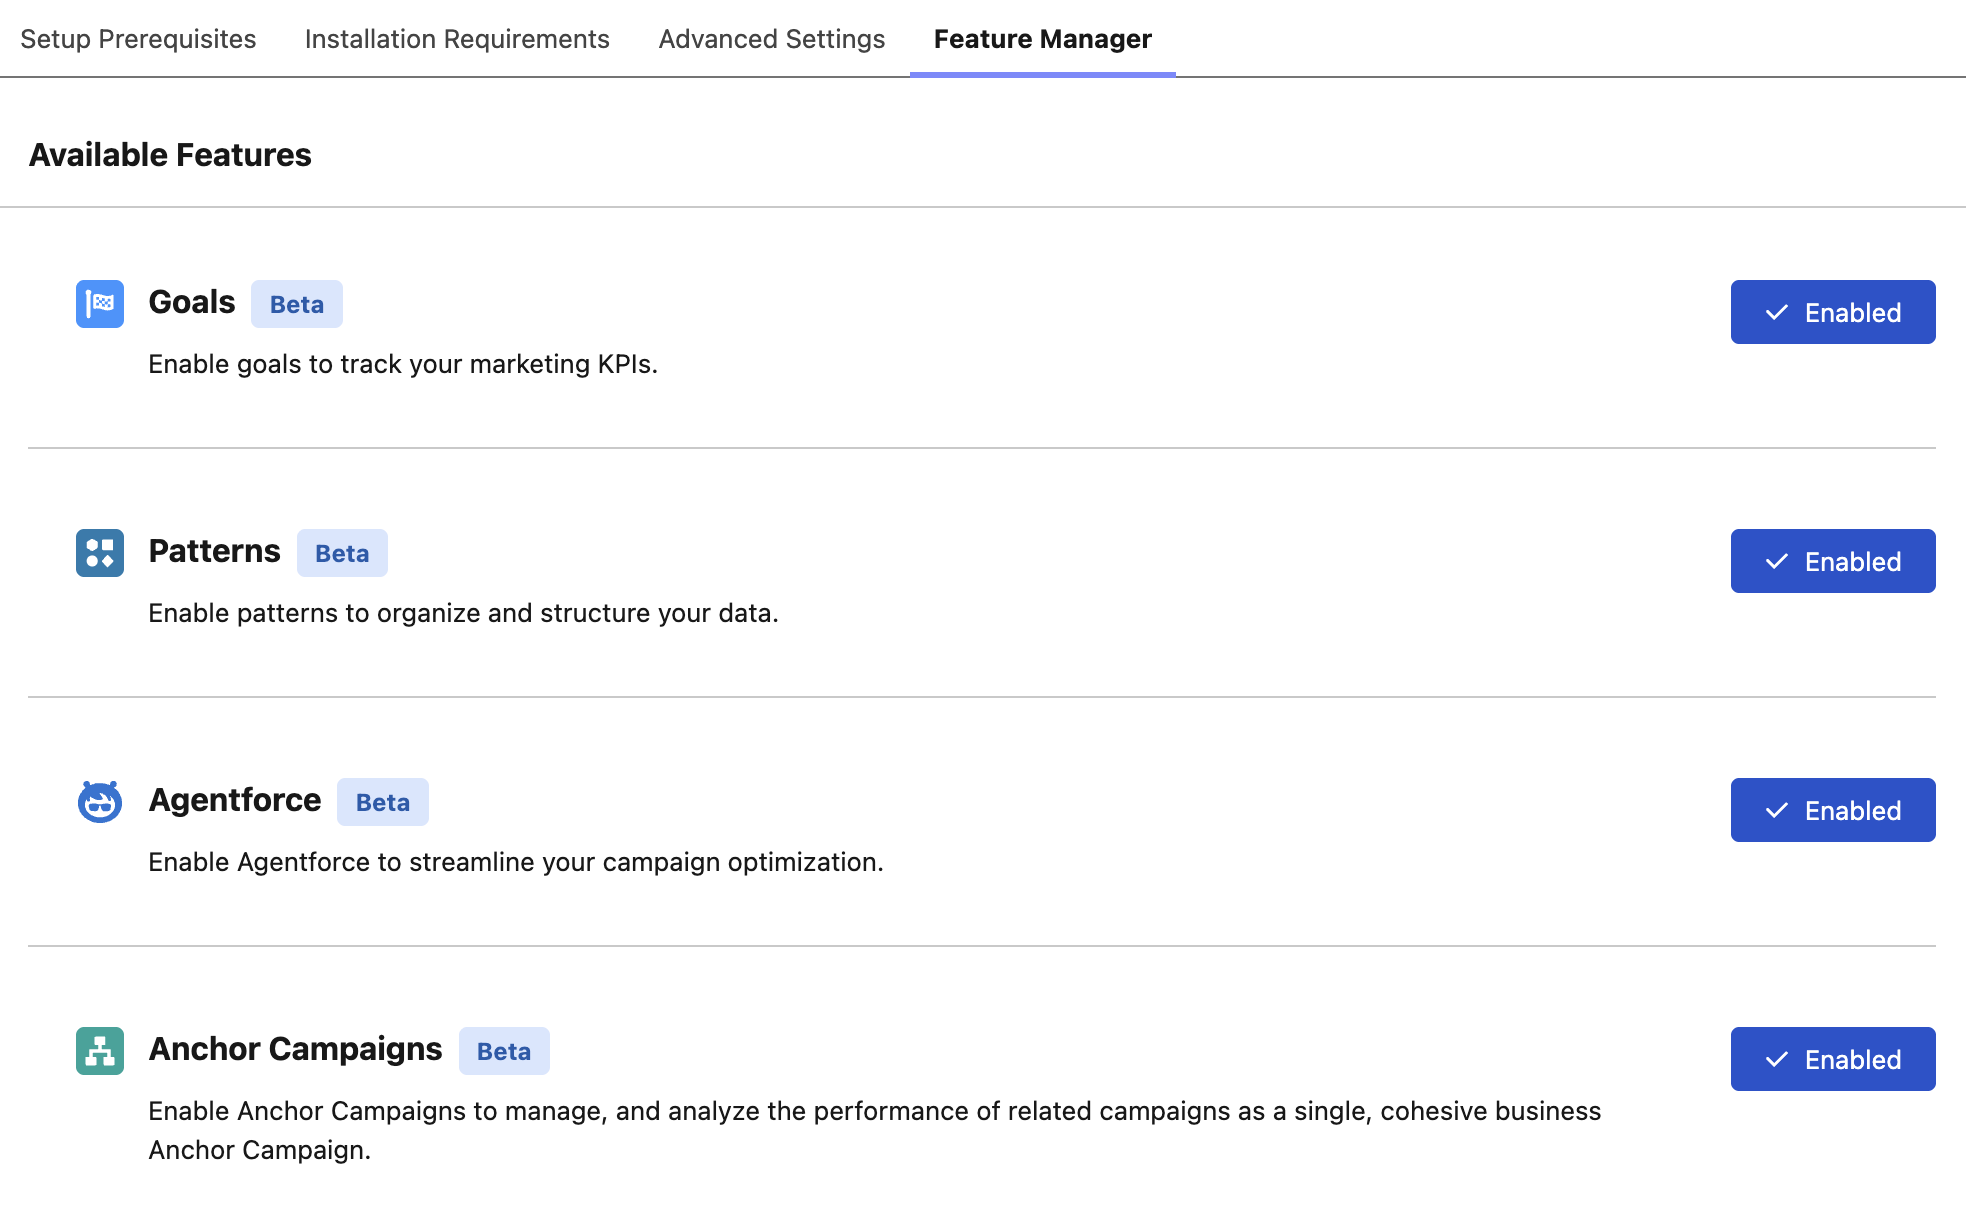
- Click the Feature Manager tab.
- Click Enable for each Available Feature on the page, clicking Enable if prompted.
Create a Paid Media Optimization Agent
- In the Quick Find field, enter
Agentforce Agents, then select Agentforce Agents from the Agentforce Studio menu. - Click
New Agent. - Select the Paid Media Optimization Agent template, then click Next.
- Click Next again.
- Copy the below text and enter it in the Company text area field.
Northern Trail Outfitters is a leading outdoor retail brand that provides high-quality gear, apparel, and equipment for hiking, camping, and adventure travel.- Click Next.
- Optionally, set the language and tone settings, then click Create.
- Click Activate on the Agentforce Builder page, then Ignore & Activate when prompted about configuration issues.
- Click the back arrow
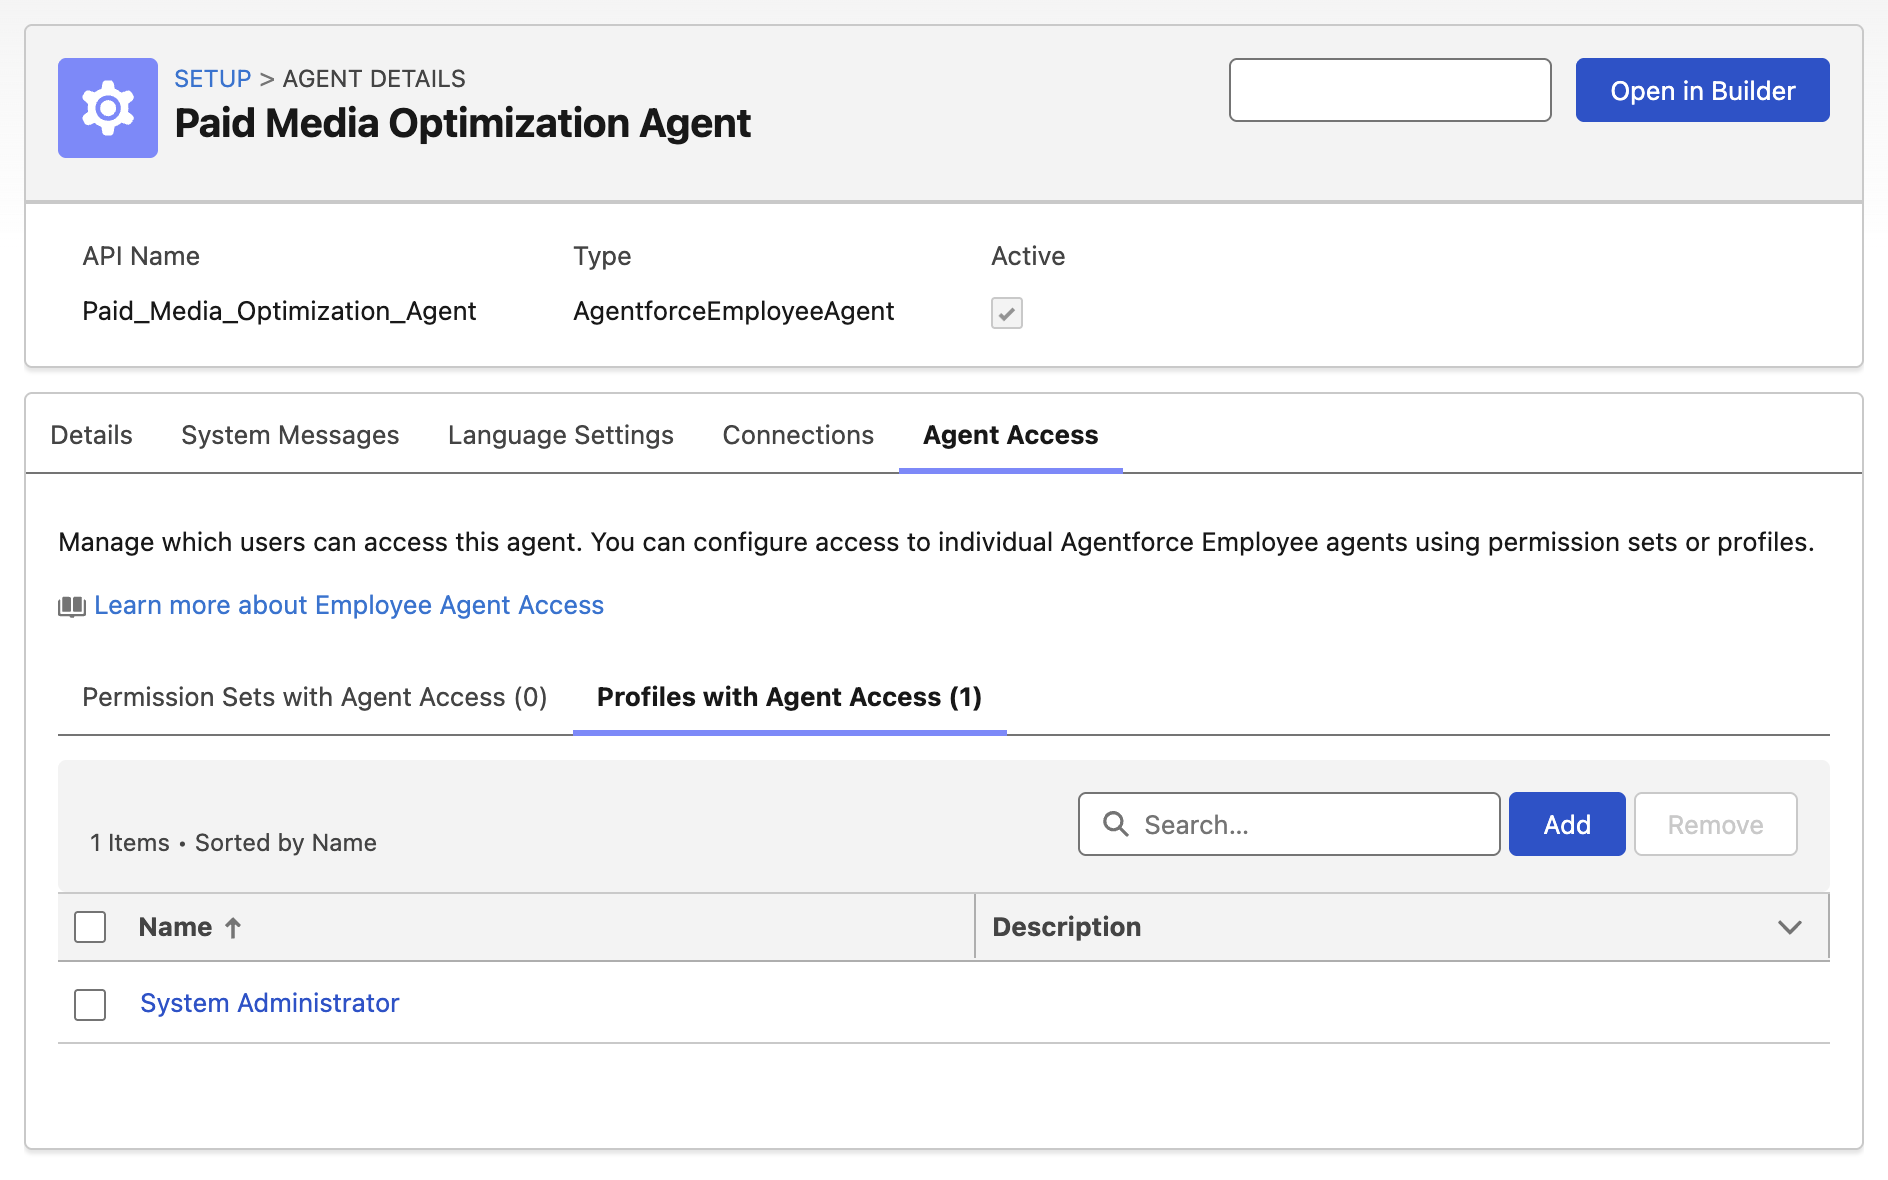
in the top left corner of the page to return to the Setup page. - Click the Paid Media Optimization Agent from the Agent page.

- Click the Agent Access tab.
- Click the Profiles with Agent Access tab.
- Click Add.
- Enter
System Administratorin the Search field. - Select the System Administrator checkbox.
- Click Add.
Create an Analytics and Visualization Agent
- In the Quick Find field, enter
Tableau Next Features, then select Tableau Next Features from the Tableau Next menu. - Toggle Concierge: Analytics Q&A to Enabled.
- In the Quick Find field, enter
Agentforce Agents, then select Agentforce Agents from the Agentforce Studio menu. - Click
New Agent. - Select the Analytics and Vizualization template, then click Next.
- Click Next again.
- Copy the below text and enter it in the Role text area field.
You help Northern Trail Outfitters teams explore and understand business performance through conversational analytics, helping teams make faster, more confident decisions.- Copy the below text and enter it in the Company text area field.
Northern Trail Outfitters is a leading outdoor retail brand that provides high-quality gear, apparel, and equipment for hiking, camping, and adventure travel.- Click Next.
- Optionally, set the language and tone settings, then click Create.
- Click Activate on the Agentforce Builder page, then Ignore & Activate when prompted about configuration issues.
- Click the back arrow
in the top left corner of the page to return to the Setup page. - Click the Analytics and Visualization from the Agent page.
- Click the Agent Access tab.
- Click the Profiles with Agent Access tab.
- Click Add.
- Enter
System Administratorin the Search field. - Select the System Administrator checkbox.
- Click Add.
Add Trusted URLs
To ensure images display correctly in Agentforce Marketing during subsequent workshops, you’ll need to add the relevant external domains to your Trusted URLs list.
- In the Quick Find field, enter
Trusted URLs, then select Trusted URLs from the Security menu. - Click New Trusted URL.
- Enter
NTO_Imagesin the API Name field. - Enter
*.githubusercontent.comin the URL field. - Click Save & New.
- Enter
Meta_Imagesin the API Name field. - Click Save.
Simulate Paid Media Connectors
In this exercise, you’ll add simulated paid media connectors that mimic how advertising data flows into Marketing Intelligence—without requiring access to live ad accounts. This allows you to demonstrate the full product experience, including realistic channel performance data, within your SDO environment.
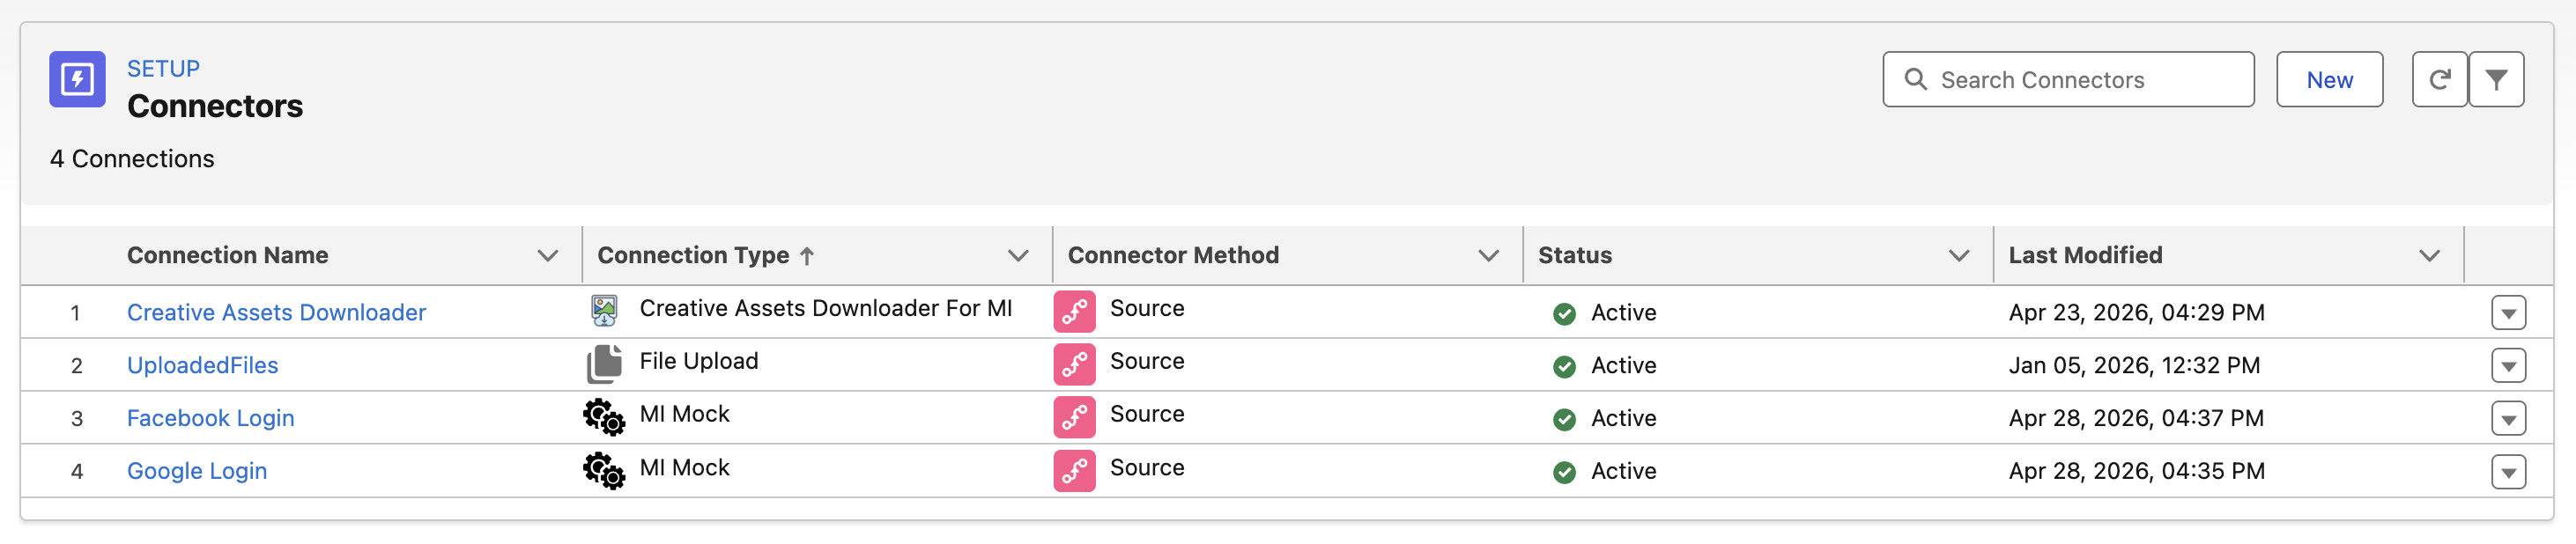
- In the Quick Find field, enter
Other Connectors, then select Other Connectors from the External Integrations menu. - Click New.
- Enter
MI Mockin the Search connectors field. - Select the MI Mock tile, then click Next.

- Enter
Google Loginin the Connection Name field, then click Save. - Click New.
- Enter
MI Mockin the Search connectors field. - Select the MI Mock tile, then click Next.
- Enter
Facebook Loginin the Connection Name field, then click Save.
Create Data Pipelines
In the following exercises, you will upload sample data to Marketing Intelligence using TotalConnect Builder, without needing to configure live ad platform integrations.
TotalConnect Builder is a Marketing Intelligence feature that simplifies bringing data from Data 360 into the Marketing Intelligence reporting layer. Using TotalConnect, you can connect your dataset to a Data Lake Object (DLO), map the fields, and Marketing Intelligence automatically handles the required data transformations and semantic model updates behind the scenes.
This allows you to quickly simulate real marketing channel data and experience the full reporting workflow without connecting to external ad accounts.
Create Delivery Data Pipeline
In this exercise, you will create a new data pipeline to track delivery engagements. These engagements are used to represent how marketing content is distributed across channels, helping measure campaign reach and delivery efficiency. This data provides the foundation for analyzing how effectively your campaigns are executed and how broadly your messaging is being delivered across channels.
- Click this link to download a sample data file to your local computer.
- Search and select
Marketing Intelligencefrom App Launcher. - Click the Data Management tab.
- Click New Pipeline.
- Click the Total Connect tile, then click Next.
- Click
Upload Files. - Select the CSV file you previously downloaded, then click Next.
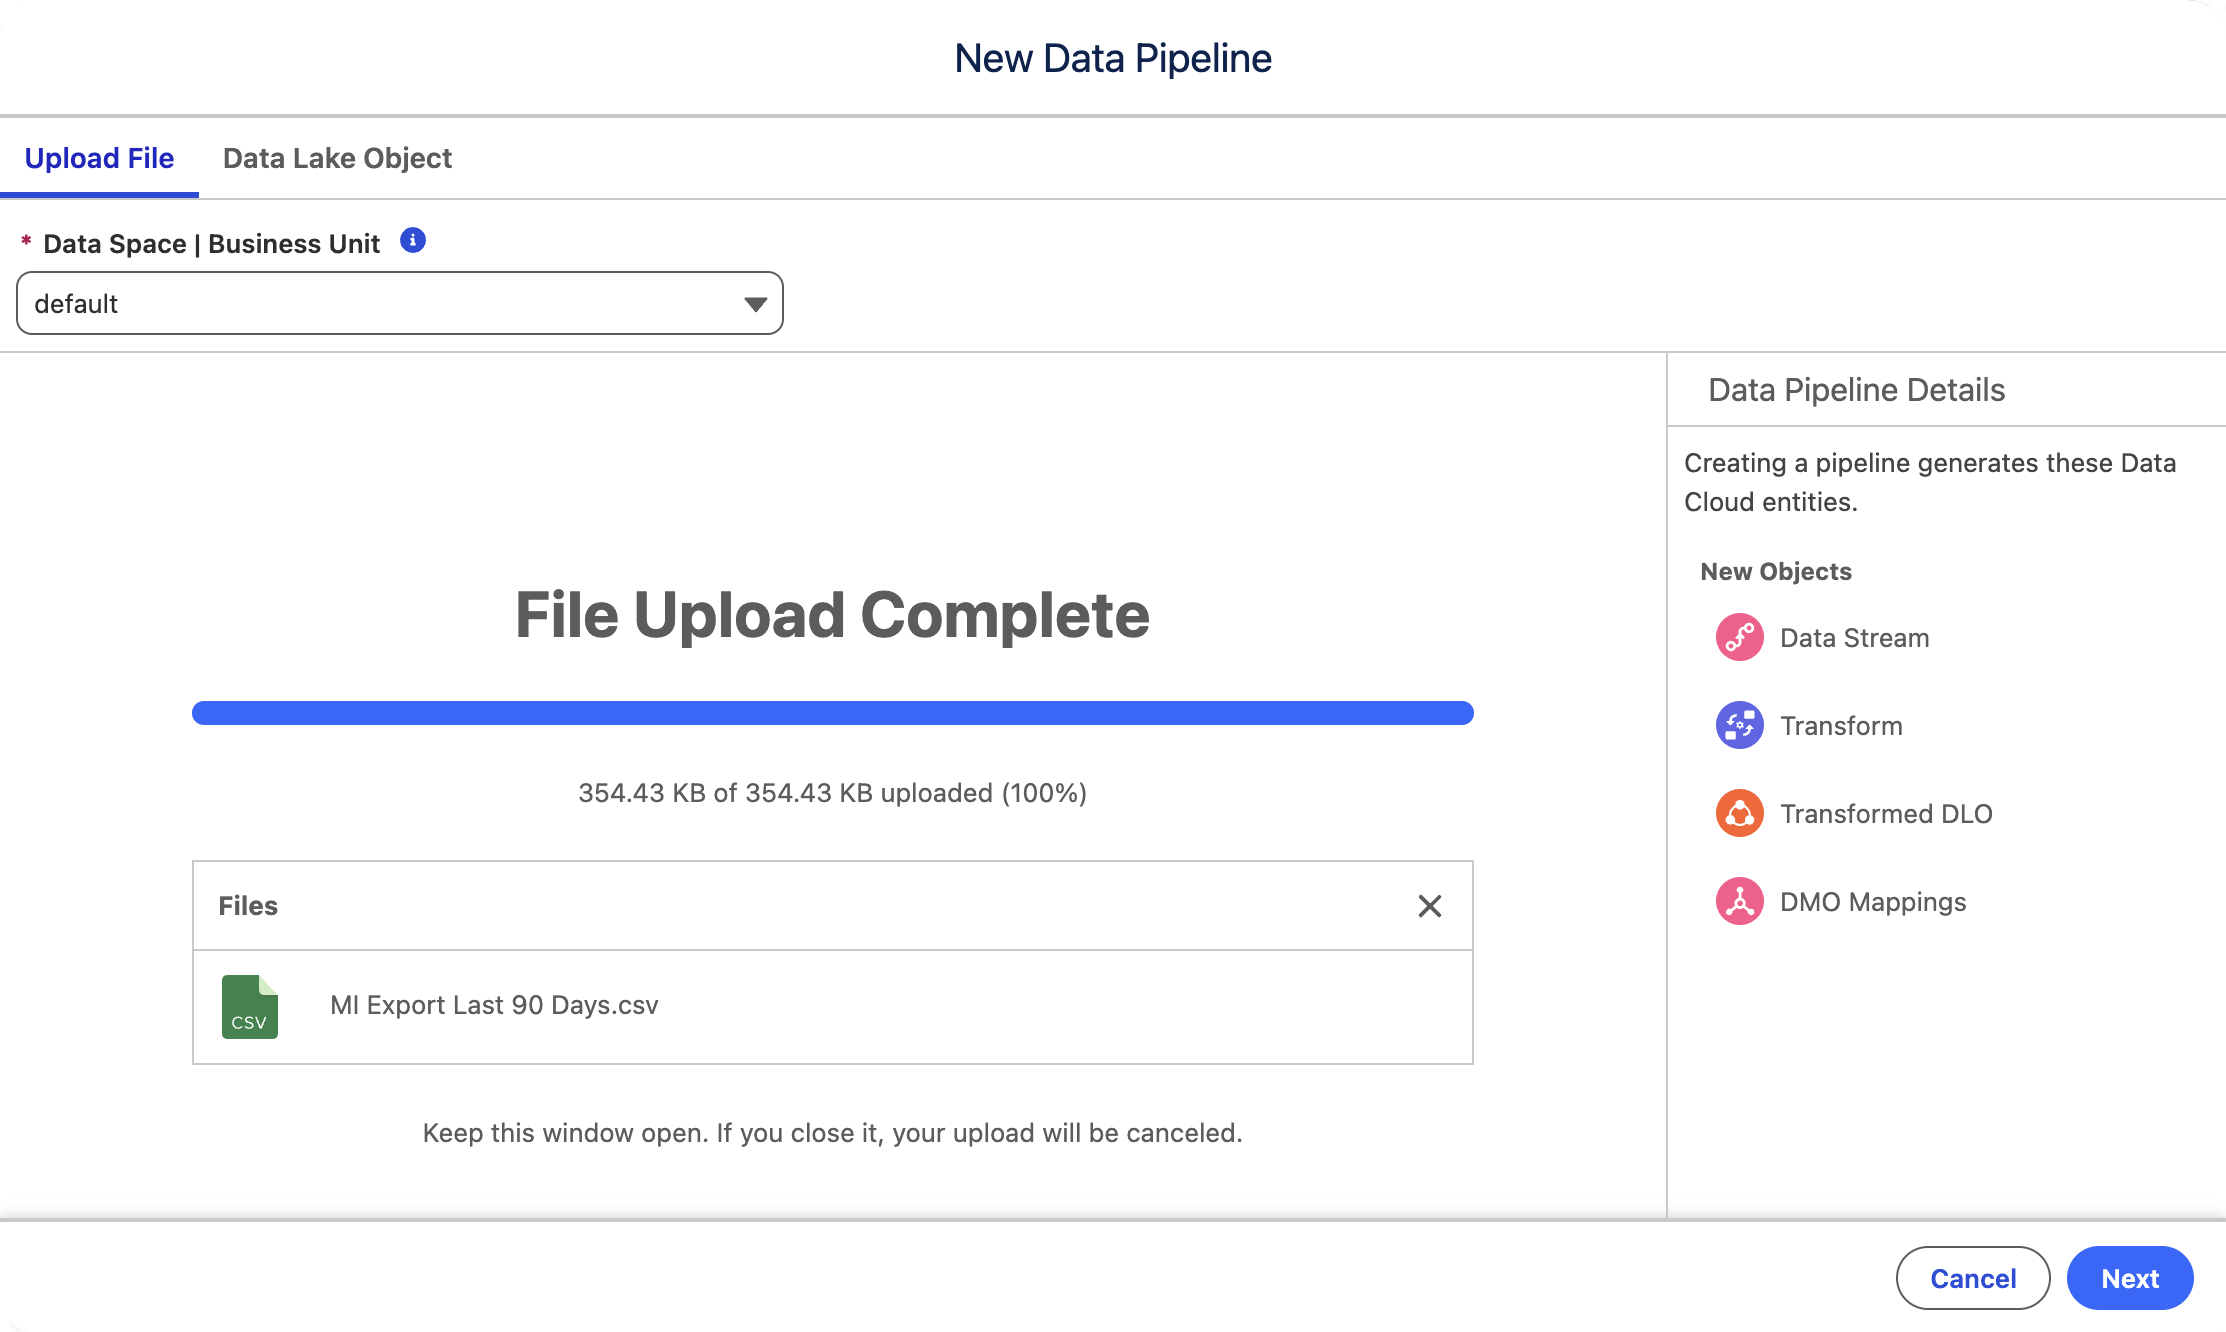
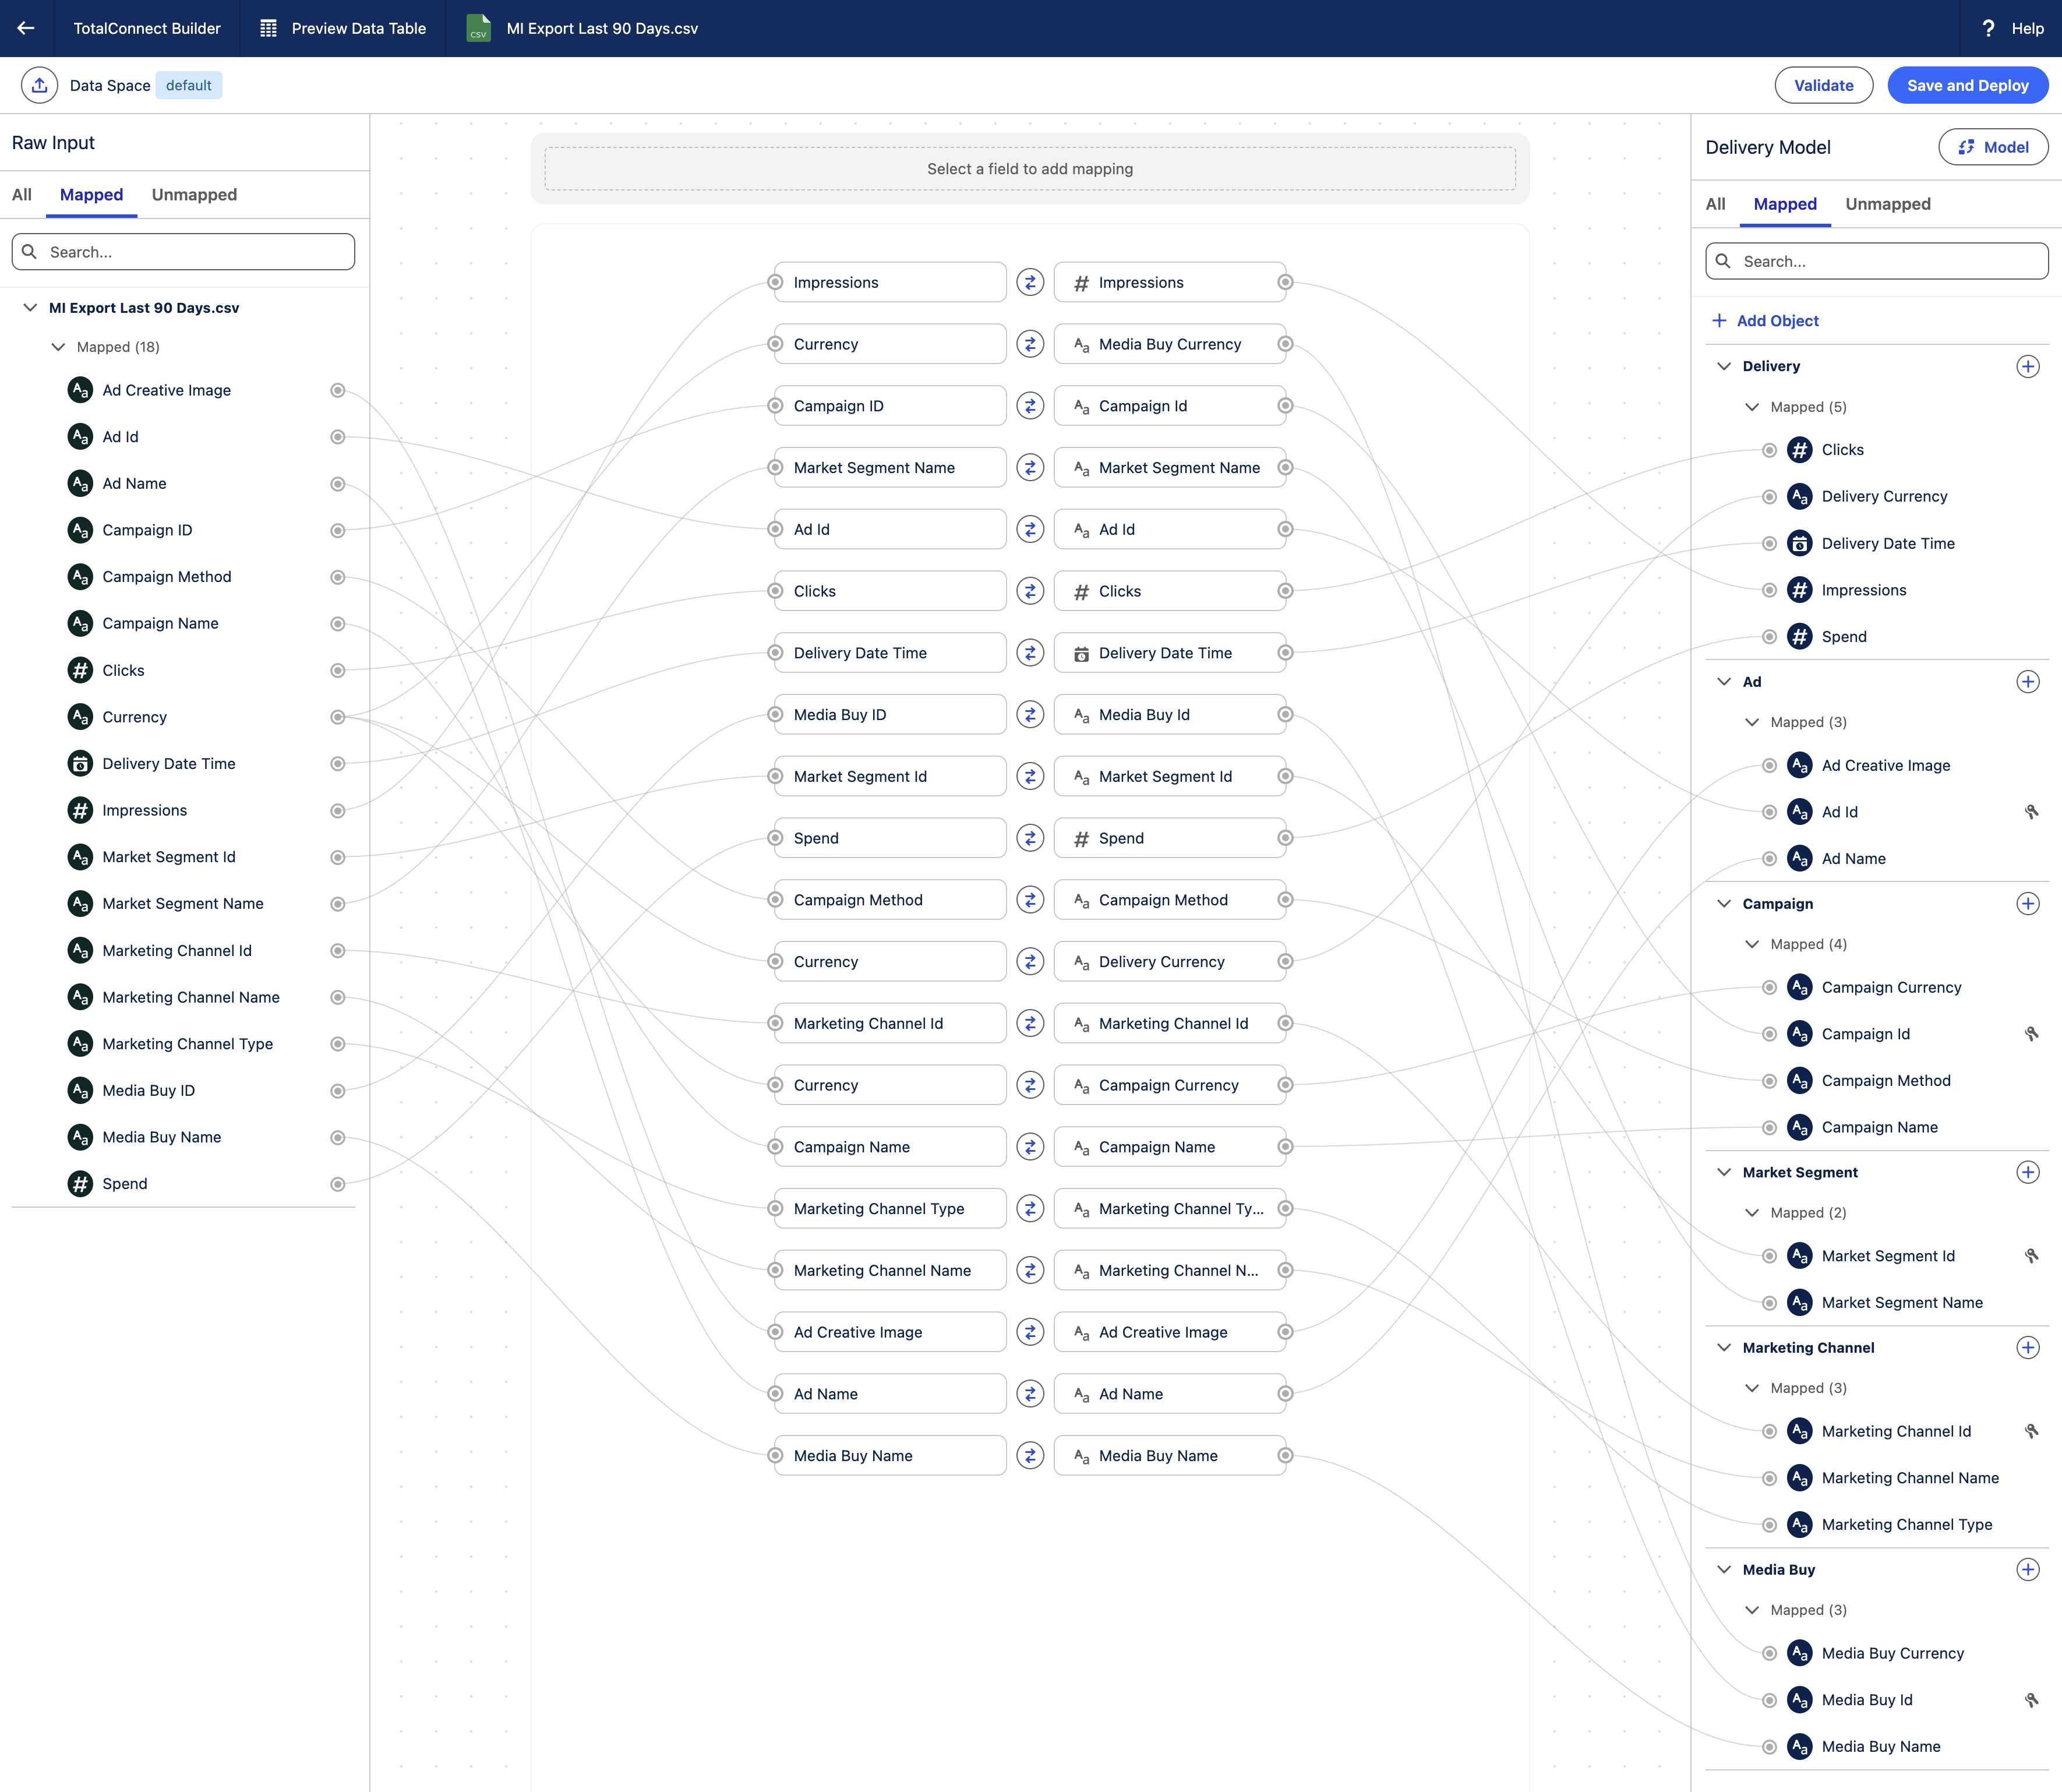
- Click Map Data.
- Click Save and Deploy.
- Click Deploy in the Confirm Your Mapping dialog.
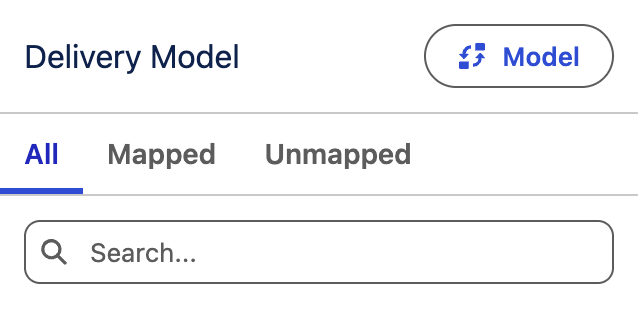
Data Mapping
TotalConnect Builder automatically maps fields from your uploaded file to the objects included in the Delivery data model template.
Create Conversion Data Pipeline
In this exercise, you will create a new data pipeline to track conversion engagements. These engagements represent the actions customers take after interacting with marketing content—for example, making a purchase, completing a form, signing up for an event, or downloading a resource. By capturing this data, you can evaluate how well your marketing efforts are influencing customer decisions and supporting key business goals.
- Click New Pipeline from the Data Pipelines page.
- Click the Total Connect tile, then click Next.
- Click
Upload Files. - Select the same CSV file you previously downloaded, then click Next.
- Click Map Data.
- Click Model in the Delivery Model panel.
- Select the Conversion data model template, then click Apply.
- Click OK when prompted that you want to change the data model.
- Click Save and Deploy.
- Click Deploy in the Confirm Your Mapping dialog.
Create Google Ads Data Pipeline
In this exercise, you will create a data pipeline for the simulated Google paid media connector that you set up earlier using the MI Mock connector. The pipeline enables the connector data to flow into Marketing Intelligence, where it can be mapped to the data model and used to analyse paid media performance.
Before you can create a pipeline using MI Connect, you will first need to enable beta connectors in Data 360.
- Click on the icon and click the first Setup menu item.
- In the Quick Find field, enter
Feature Manager, then select Feature Manager from the Data Cloud Feature Management menu. - Click Enable in Connectors (Beta) section.

- Select the opt-in checkbox, then click Enable.
- Open the Data Management tab in the Marketing Intelligence app.
- Click New Pipeline from the Data Pipelines page.
- Click the MI Connect tile, then click Next.
- Select Google Ads from the Connector Menu.
- Select Google Login from the Connection Menu.
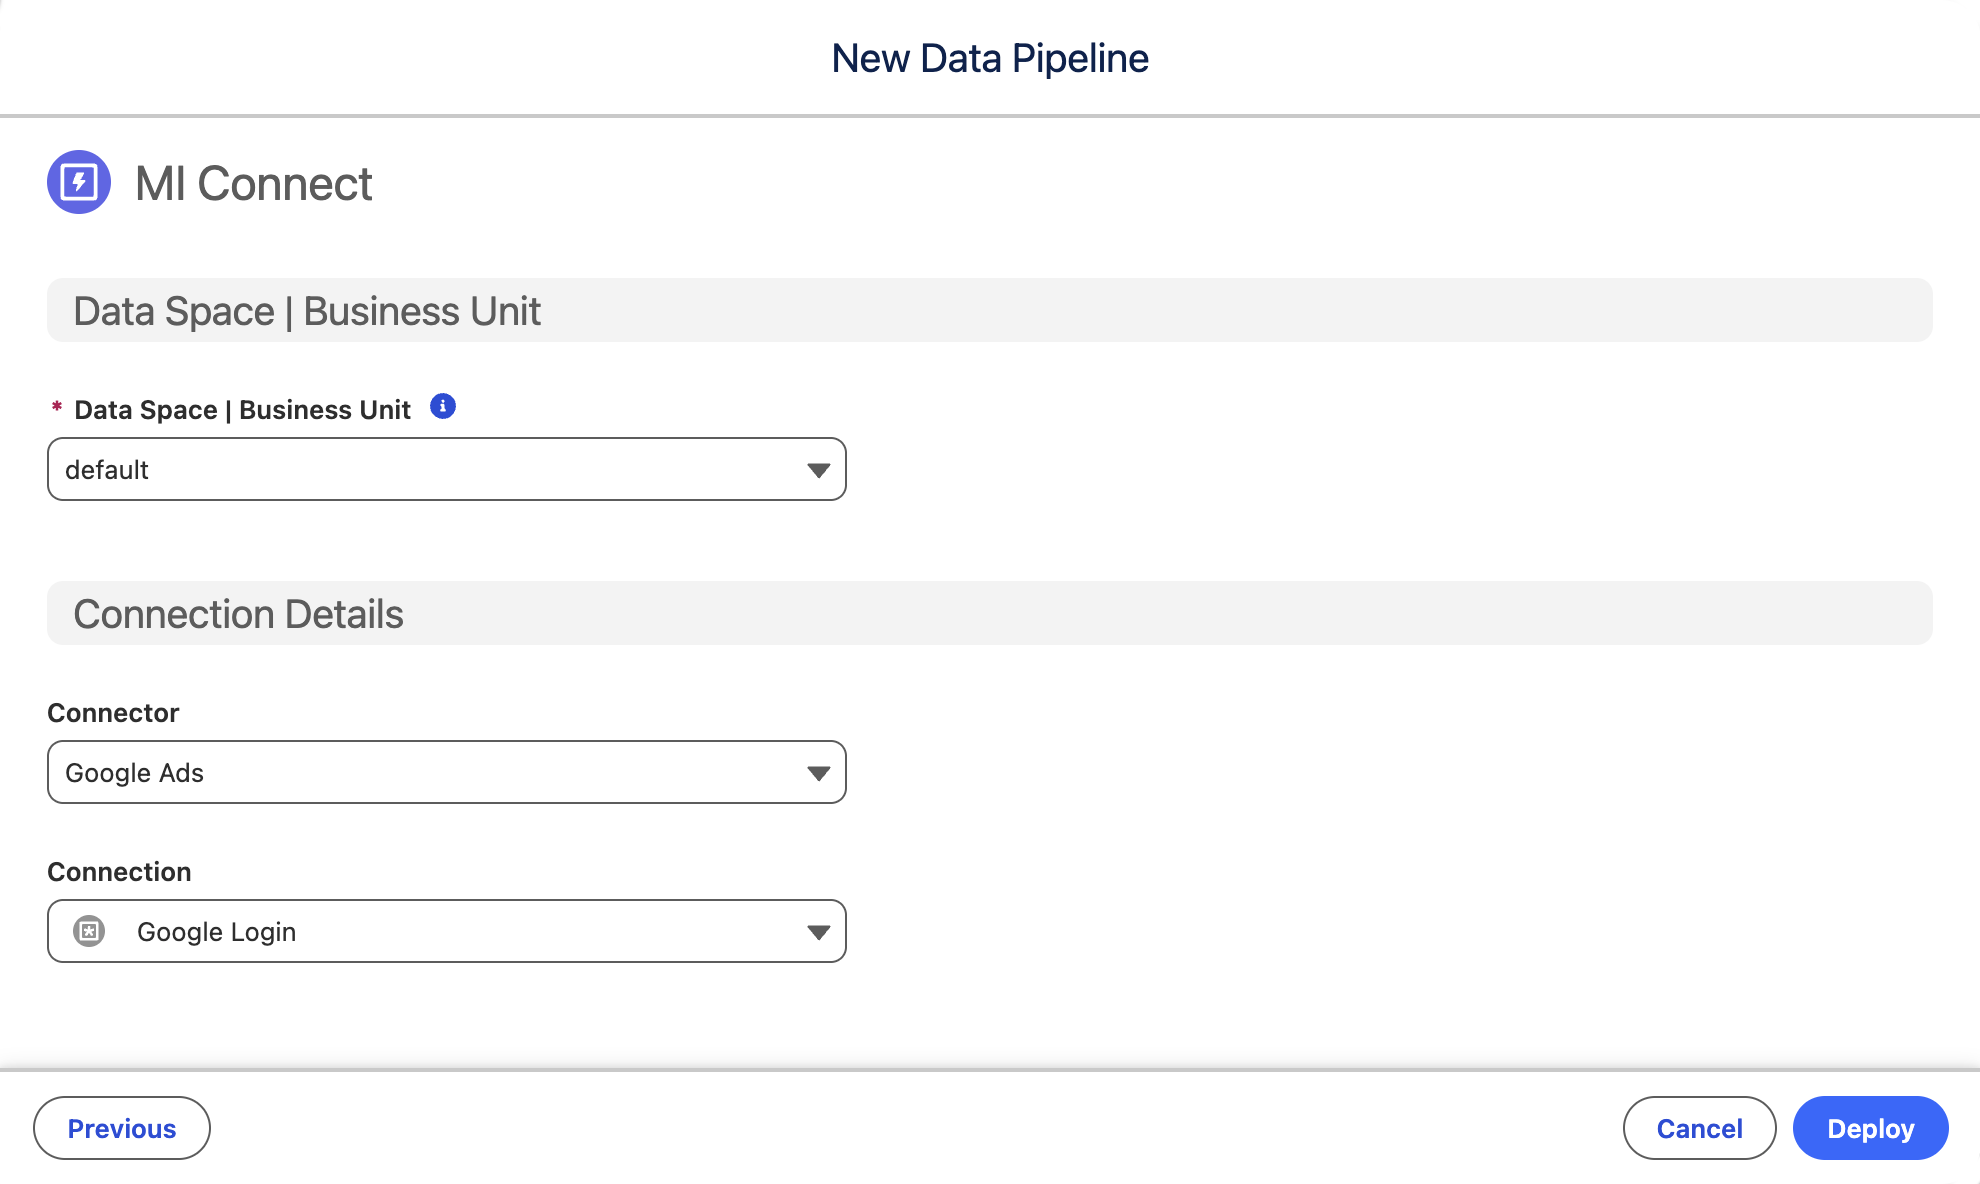
- Click Deploy.
Create Facebook Ads Data Pipeline
Similar to the previous exercise, you will also need to create a data pipeline for the simulated Facebook paid media connector that you set up earlier using the MI Mock connector.
- Click New Pipeline from the Data Pipelines page.
- Click the MI Connect tile, then click Next.
- Select Facebook Ads from the Connector Menu.
- Select Facebook Login from the Connection Menu.
- Click Deploy.
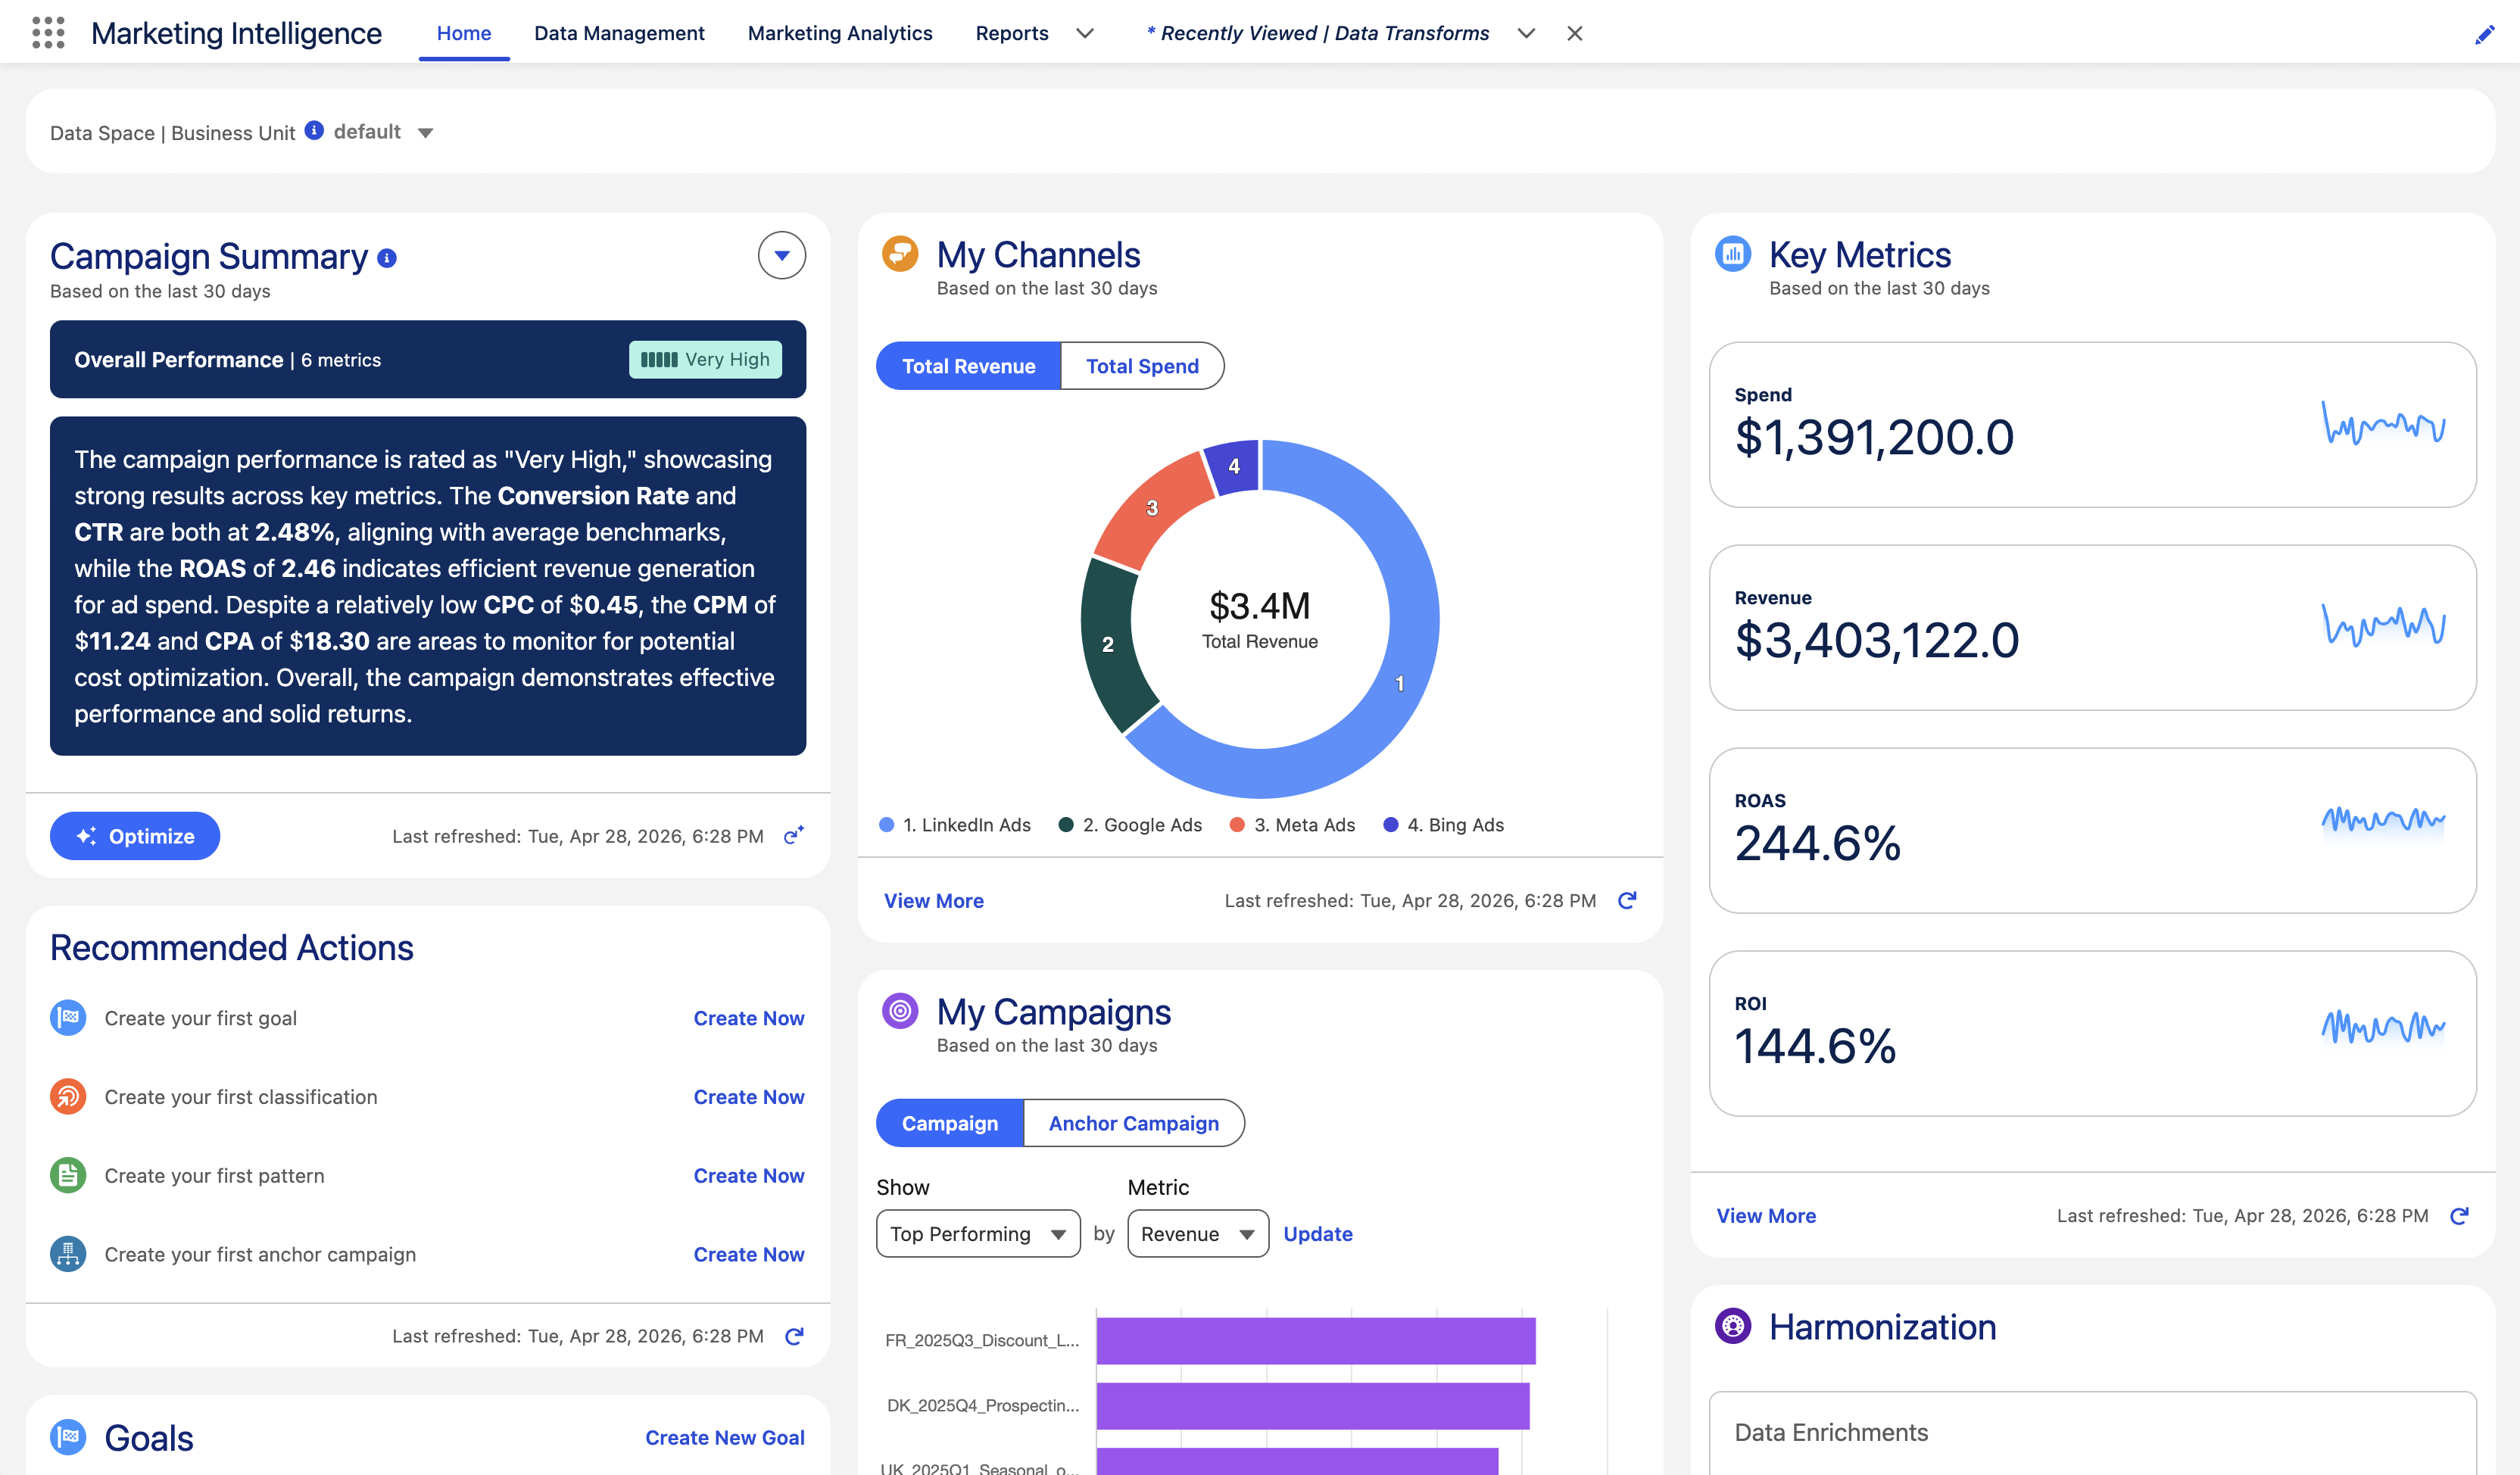
View Insights
The Marketing Intelligence home page provides an interactive overview of your marketing strategy, data health, and performance against key goals.
Once your data pipelines have finished processing, click the Home tab in Marketing Intelligence to explore insights generated from your data and begin reviewing overall marketing performance.
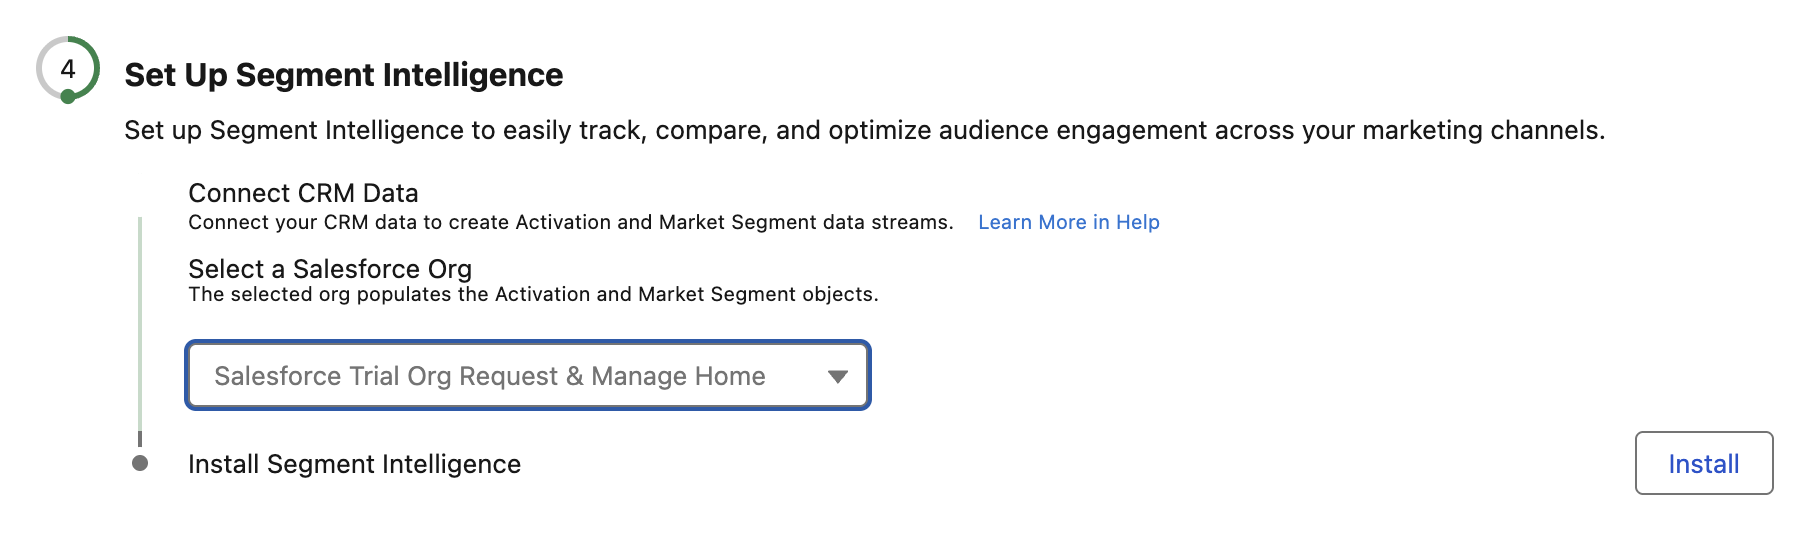
Install Segment Intelligence (Optional)
Segment Intelligence is a Marketing Intelligence feature that delivers audience-level performance insights across paid media channels. It links your Data 360 segments with campaign performance data so you can evaluate how activated audiences respond to advertising.
This helps marketers move beyond campaign-level reporting to understand which audiences are converting and delivering measurable value, enabling more informed targeting and optimization decisions.
- Click on the icon and click the first Setup menu item.
- In the Quick Find field, enter
Marketing Intelligence, then select Marketing Intelligence from the Marketing menu. - Click the Advanced Settings tab.
- Click on Set Up Segment Intelligence to expand the section, if it's collapsed.
- Select your Salesforce Org from the Select a Salesforce Org menu.
- Click Install.